> For the complete documentation index, see [llms.txt](https://docs.dinmo.io/llms.txt). Markdown versions of documentation pages are available by appending `.md` to page URLs; this page is available as [Markdown](https://docs.dinmo.io/journeys/best-practices.md).

# Design reliable Journeys

A reliable Journey should make it easy to understand who enters, what happens to each profile, and when profiles leave.

Before publishing, someone who did not build the Journey should be able to review its behavior without having to inspect every configuration detail.

## Start with the expected outcome

Before adding steps, define:

* Who should enter the Journey.
* What should happen after entry.
* Which destinations may receive profiles.
* What should cause a profile to leave.
* Whether profiles should be allowed to enter again.
* What should happen when an expected event never occurs.

Keeping this outcome clear makes it easier to choose the appropriate steps and avoid unnecessary branches.

## Keep entry and re-entry under control

Use entry rules that are easy to explain and verify.

When combining several conditions, check the AND/OR logic carefully. A broader rule may enroll significantly more profiles than expected, while an overly restrictive rule may prevent anyone from entering.

Also consider when the underlying source data is refreshed. A Journey can only evaluate the data available when it runs.

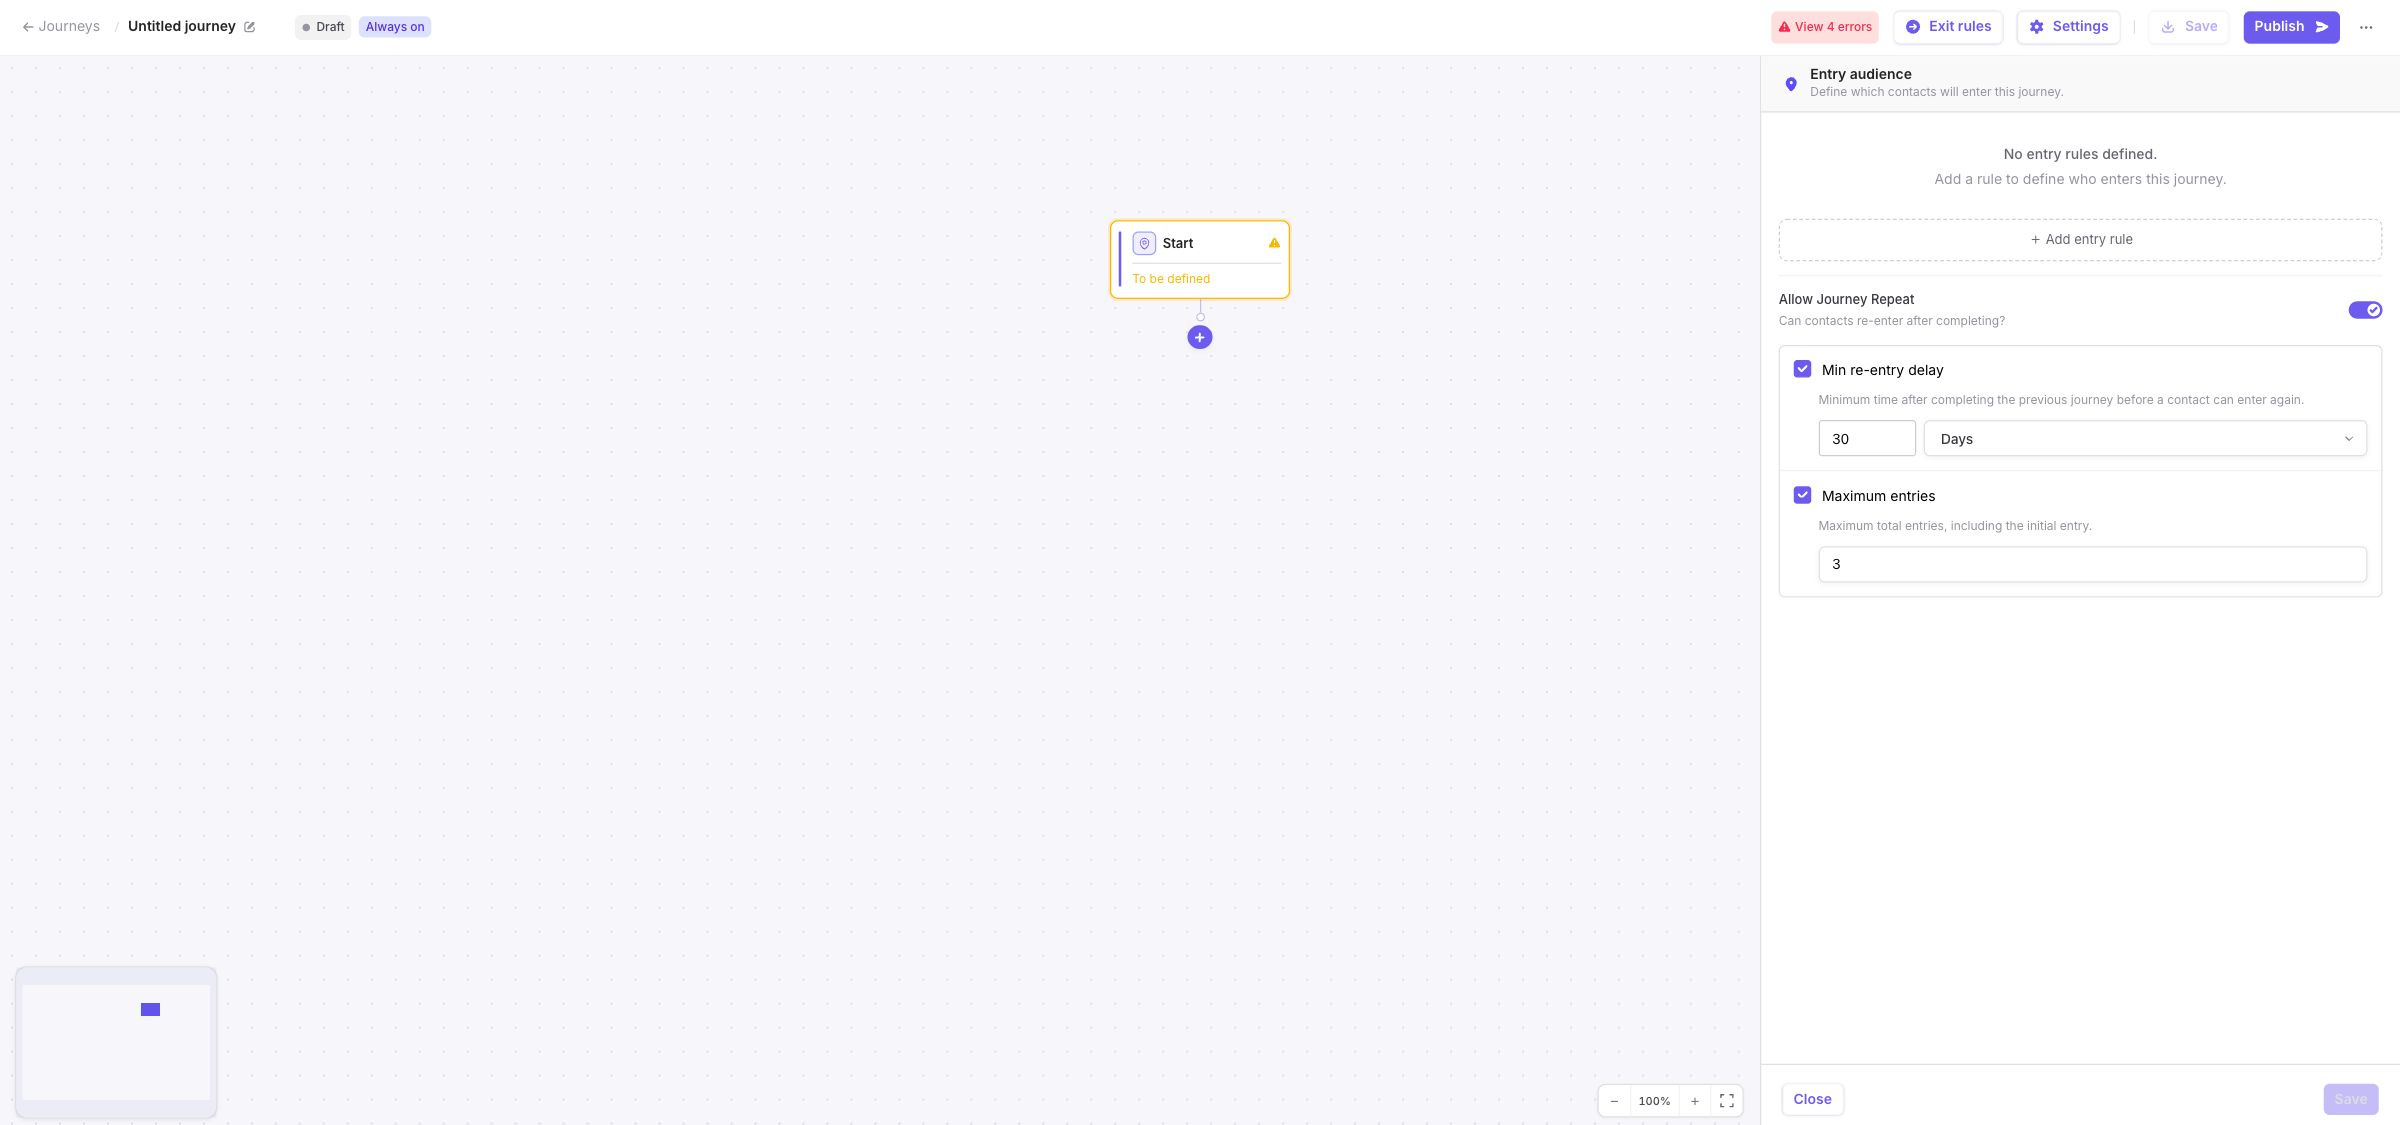
If re-entry is enabled:

* Confirm that repeated activation is intentional.
* Configure an appropriate re-entry delay.
* Consider adding a Wait before the first Activate step.
* Check that the full Journey duration is consistent with the expected re-entry frequency.

For example, you can add a Wait before the first activation to prevent a profile from completing and re-entering the Journey too quickly.

<figure><img src="https://3204318043-files.gitbook.io/~/files/v0/b/gitbook-x-prod.appspot.com/o/spaces%2FxzBTp1t4OfqV67nXkVse%2Fuploads%2Fgit-blob-ed0a435d6dc30fab81b4ea67d851ddc354e220e4%2Fjourney-rules-reentry-settings.jpg?alt=media" alt="Journey entry settings showing a minimum re-entry delay and a maximum number of entries"><figcaption><p>Use a delay and an entry limit to control how frequently profiles can repeat a Journey.</p></figcaption></figure>

## Choose between Wait and Pause Until

Wait and Pause Until both delay progression, but they address different needs.

|                    | **Wait**                     | **Pause Until**                                       |
| ------------------ | ---------------------------- | ----------------------------------------------------- |
| Progresses when    | A fixed duration has elapsed | A condition is met or the maximum duration is reached |
| Number of paths    | One                          | One, or two when a maximum duration is configured     |
| Can progress early | No                           | Yes                                                   |
| Best suited for    | Time-based sequencing        | Event- or condition-based sequencing                  |

### Use Wait for a fixed delay

Use Wait when the next step should always happen after a defined duration.

For example, you can add a Wait condition to delay an activation for several hours or days after entry.

Avoid splitting a simple delay into several consecutive Wait steps. A single, clearly configured Wait is easier to understand and monitor.

### Use Pause Until for a condition

Use Pause Until when progression depends on an event or a profile attribute.

For example, you can pause profiles until they complete a purchase, reach a specific status, or trigger another expected event.

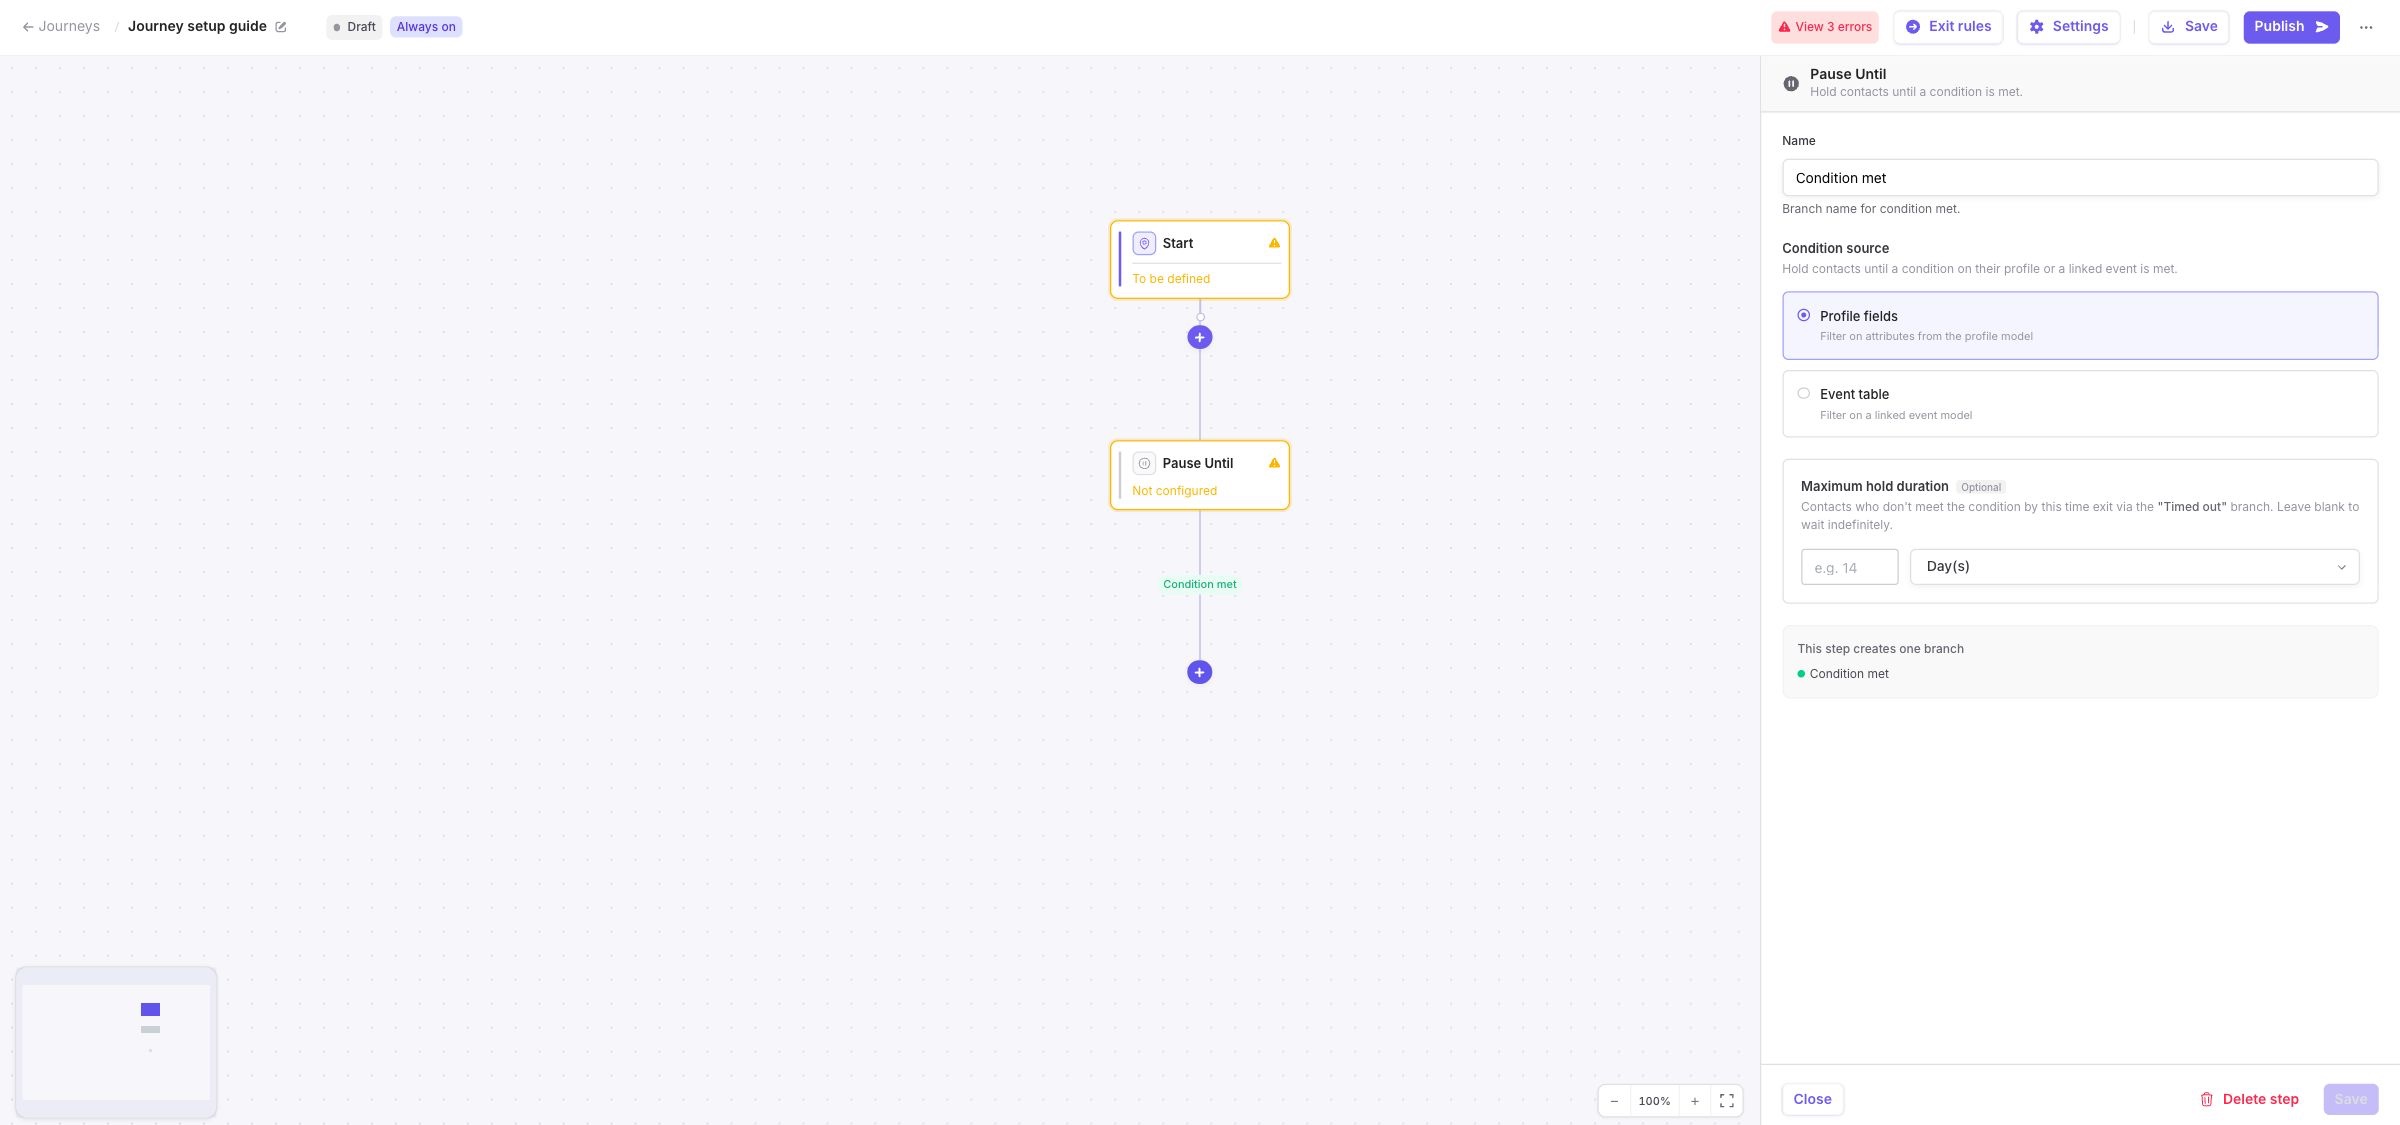
When a maximum duration is configured, Pause Until creates two paths:

* The condition was met.
* The maximum duration was reached.

Both paths should represent an intentional outcome and lead to another step or a Stop step.

Use a maximum duration that reflects a meaningful business deadline. A very short duration may not leave enough time for the condition to occur, while a very long duration may leave profiles waiting longer than intended.

<figure><img src="https://3204318043-files.gitbook.io/~/files/v0/b/gitbook-x-prod.appspot.com/o/spaces%2FxzBTp1t4OfqV67nXkVse%2Fuploads%2Fgit-blob-c6d53c477d8c72e629092e14caba105d120cece4%2Fjourney-steps-pause-until.jpg?alt=media" alt="Pause Until configuration panel showing condition sources and the optional maximum hold duration"><figcaption><p>Use Pause Until for a condition and add a maximum duration when profiles need a fallback path.</p></figcaption></figure>

{% hint style="info" %}
If you only need to delay progression for a fixed duration, use Wait. Do not use the maximum duration of a Pause Until step as a substitute for a Wait.
{% endhint %}

## Keep branches purposeful

Use a Segment step when profiles should follow meaningfully different paths.

Before adding a branch, ask whether each group leads to different timing, activation, or exit behavior. If the paths immediately converge or perform the same actions, the branch may be unnecessary.

For every Segment step:

* Make each group definition easy to understand.
* Review the **Everyone else** path.
* Connect every group to a downstream step.
* End every completed path with a Stop step.

Limit the number of branches and nested decisions where possible. A smaller number of clear paths is easier to validate and troubleshoot.

## Make every exit intentional

Stop steps and exit rules solve different problems:

* A **Stop** step marks the normal end of a specific path.
* An **exit rule** removes a profile from the Journey when it is no longer relevant, regardless of its current step.

Every branch must end with a Stop step, even when exit rules are configured.

Use exit rules when a business event should prevent further progression. For example, you can make profiles leave the Journey after they convert, unsubscribe, or no longer meet an eligibility condition.

Check that exit rules are not broader than intended. A profile that matches an exit rule cannot continue to later steps in the Journey.

## Reduce activation risk

An Activate step can update one or several destinations. Before publishing, verify that each activation is expected and correctly timed.

Consider adding a Wait before the first Activate step unless profiles should be activated immediately after entry.

Also check that:

* Every Activate step has the intended destinations.
* The same destination is not used in several steps unintentionally.
* Each branch activates only the profiles it is designed for.
* Exit rules can remove profiles before an activation that is no longer relevant.
* The expected entry volume is appropriate for the destination.

When possible, start with a narrow entry audience and monitor the first executions before expanding the Journey to a larger population.

## Review the complete path before publishing

Follow every possible path from Start to Stop, including fallback and timeout paths.

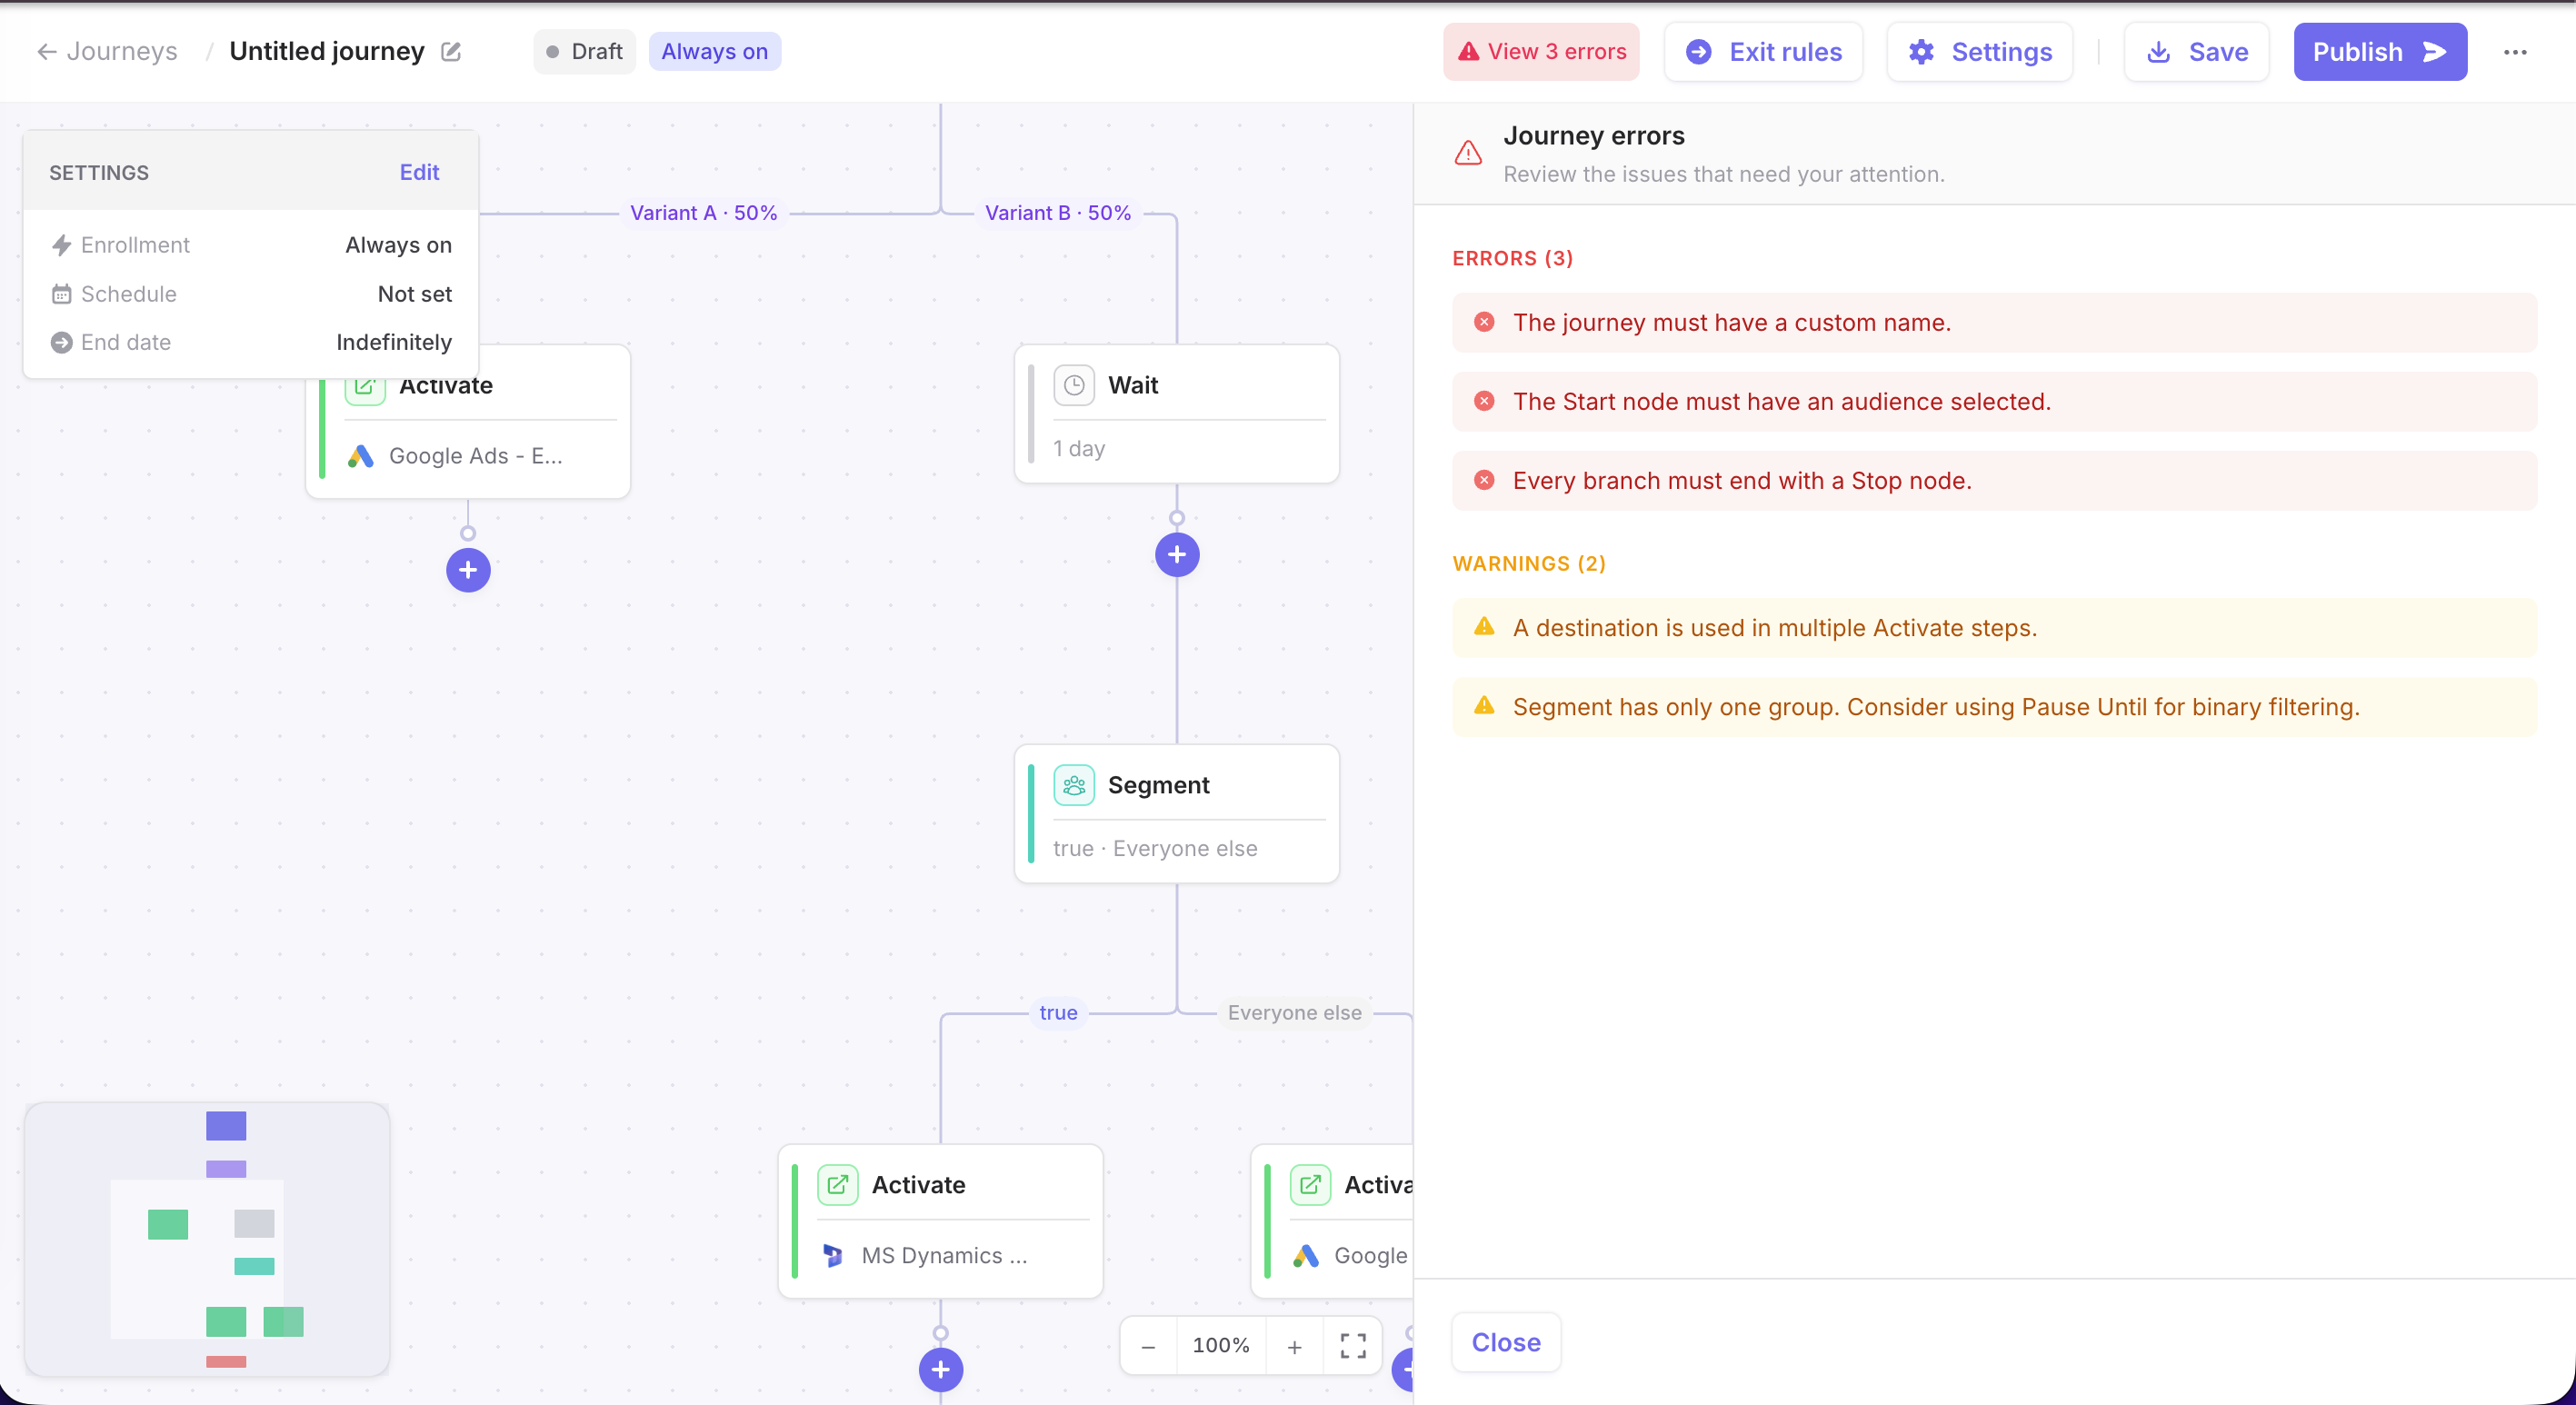
<figure><img src="https://3204318043-files.gitbook.io/~/files/v0/b/gitbook-x-prod.appspot.com/o/spaces%2FxzBTp1t4OfqV67nXkVse%2Fuploads%2Fgit-blob-86d98866b2d62430f68a1c87670e54637f3ef302%2Fjourney-monitor-validation.png?alt=media" alt="Journey validation panel showing blocking errors and warnings"><figcaption><p>Use the validation panel as the final technical check before publication.</p></figcaption></figure>

### Entry and re-entry

* [ ] The entry rules identify the intended profiles.
* [ ] The AND/OR logic has been reviewed.
* [ ] The data refresh frequency is compatible with the Journey.
* [ ] Re-entry settings and delays are intentional.

### Timing

* [ ] Each Wait duration has a clear purpose.
* [ ] Pause Until is only used for a condition or event.
* [ ] Every Pause Until maximum duration is appropriate.
* [ ] Immediate activation after entry is intentional.

### Branches and exits

* [ ] Every Segment group is connected.
* [ ] The Everyone else path has been reviewed.
* [ ] Every Pause Until path is connected.
* [ ] Every branch ends with a Stop step.
* [ ] Exit rules remove only the intended profiles.

### Activations

* [ ] Every Activate step has the correct destinations.
* [ ] Repeated use of the same destination is intentional.
* [ ] Each activation occurs on the correct path.

### Publication

* [ ] Every blocking error has been resolved.
* [ ] Every warning has been reviewed.
* [ ] The Journey schedule and end date are correct.
* [ ] Another person can explain the Journey's behavior.

## Change a published Journey carefully

When updating an existing Journey:

1. Pause it before editing.
2. Make one meaningful change at a time.
3. Review every path affected by the change.
4. Resolve new validation errors and warnings.
5. Publish the new version.
6. Check the first run and the Activity panel.

Making several unrelated changes at once can make unexpected behavior harder to explain. The run history version helps identify which Journey configuration was used for each execution.

## Monitor after publication

After publishing or resuming a Journey:

* Confirm that the first run completes successfully.
* Check that the number of profiles entering is reasonable.
* Inspect Activity on important Wait, Pause Until, Segment, and Activate steps.
* Confirm that actions are executed at the expected volume.
* Investigate failures before triggering another run.

Monitoring the first executions is especially important after changing entry rules, re-entry settings, branching, timing, or destinations.

## Related pages

* [Configure entry, re-entry, and exit rules](/journeys/entry-rules.md)
* [Configure Journey steps and branches](/journeys/steps-and-branches.md)
* [Publish and manage a Journey](/journeys/publish-pause-and-resume-a-journey.md)
* [Monitor and troubleshoot a Journey](/journeys/monitoring-and-troubleshooting.md)


---

# Agent Instructions
This documentation is published with GitBook. GitBook is the documentation platform designed so that both humans and AI agents can read, navigate, and reason over technical content effectively. Learn more at gitbook.com.

## Querying This Documentation
If you need additional information that is not directly available in this page, you can query the documentation dynamically by asking a question.

Perform an HTTP GET request on the current page URL with the `ask` query parameter, and the optional `goal` query parameter:

```
GET https://docs.dinmo.io/journeys/best-practices.md?ask=<question>&goal=<endgoal>
```

`ask` is the immediate question: it should be specific, self-contained, and written in natural language.
`goal` is optional and describes the broader end goal you are ultimately trying to accomplish on behalf of the user. GitBook uses it to tailor the answer towards what is most useful for that goal.

The response will contain a direct answer to the question and relevant excerpts and sources from the documentation.

Use this mechanism when the answer is not explicitly present in the current page, you need clarification or additional context, or you want to retrieve related documentation sections.