> For the complete documentation index, see [llms.txt](https://docs.dinmo.io/llms.txt). Markdown versions of documentation pages are available by appending `.md` to page URLs; this page is available as [Markdown](https://docs.dinmo.io/journeys/create-your-first-journey.md).

# Create your first Journey

This guide explains the main actions available when creating a Journey, from configuring enrollment to publication.

You do not need to follow a predefined template. Add only the steps and rules required for your use case.

## Before you begin

Make sure you have:

* access to Journeys in DinMo;
* an audience or tracked event that can be used as an entry rule;
* at least one destination available for activation;
* permission to publish Journeys.

## 1. Create a Journey

1. Open **Journeys** in your Customer Hub.
2. Select **New Journey**.
3. Replace the default name with a name that describes its purpose.

For example:

* `Welcome new customers`
* `Re-engage inactive customers`
* `Post-purchase follow-up`

A Journey cannot be published with the default name. Its name must not exceed 100 characters.

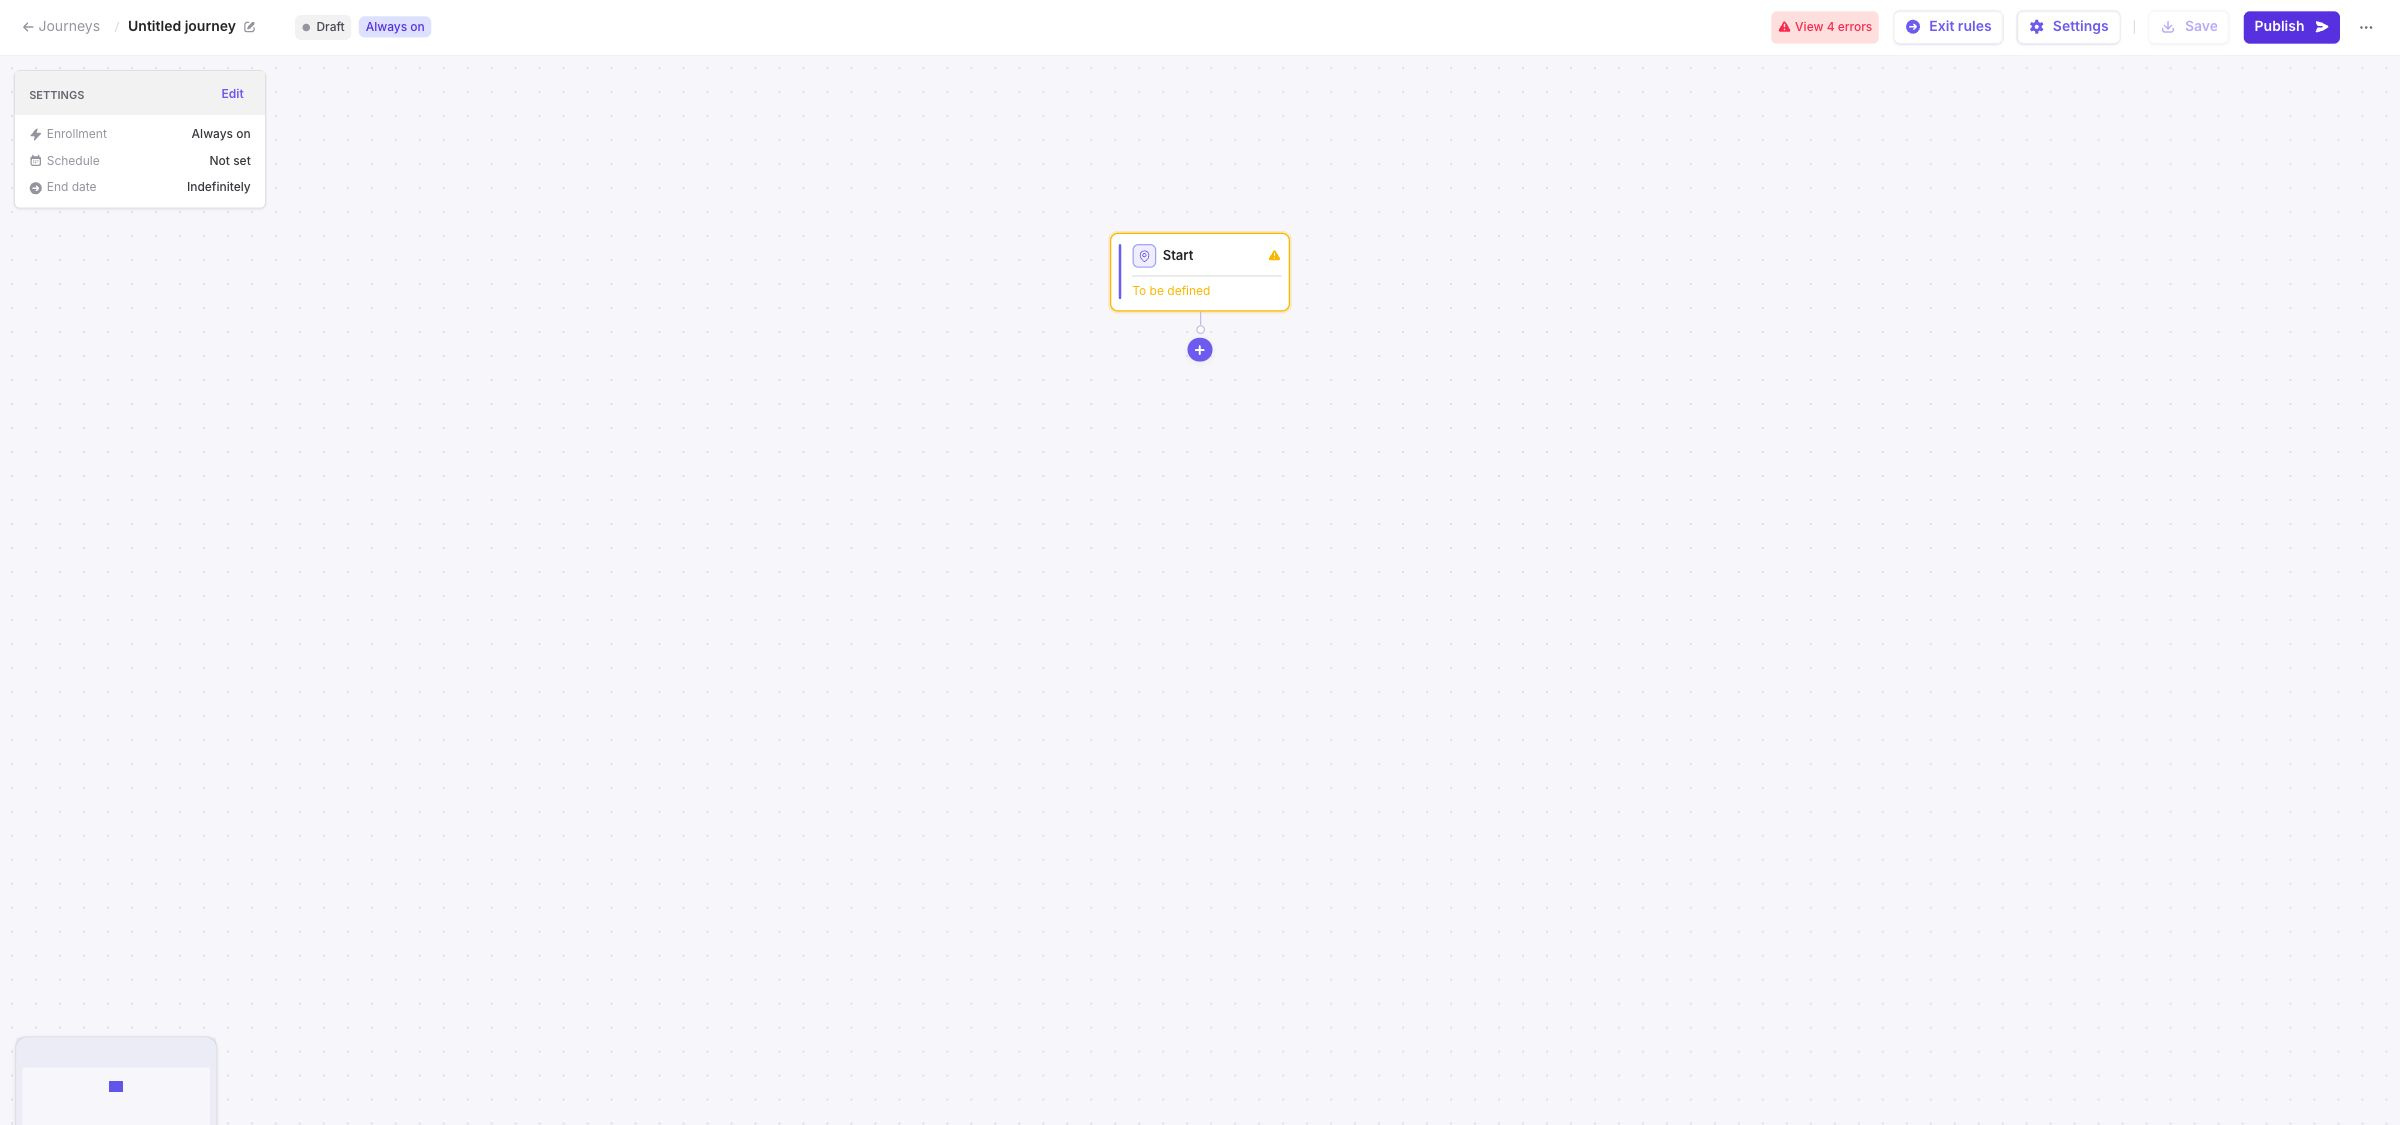
<figure><img src="https://3204318043-files.gitbook.io/~/files/v0/b/gitbook-x-prod.appspot.com/o/spaces%2FxzBTp1t4OfqV67nXkVse%2Fuploads%2Fgit-blob-1bbec163cd5cbb1e9903c67b74b65aa2f15b322f%2Fjourney-create-empty.jpg?alt=media" alt="New Journey draft showing the initial Start step and the main builder controls"><figcaption><p>A new Journey starts as a draft with a single Start step.</p></figcaption></figure>

## 2. Configure enrollment and execution

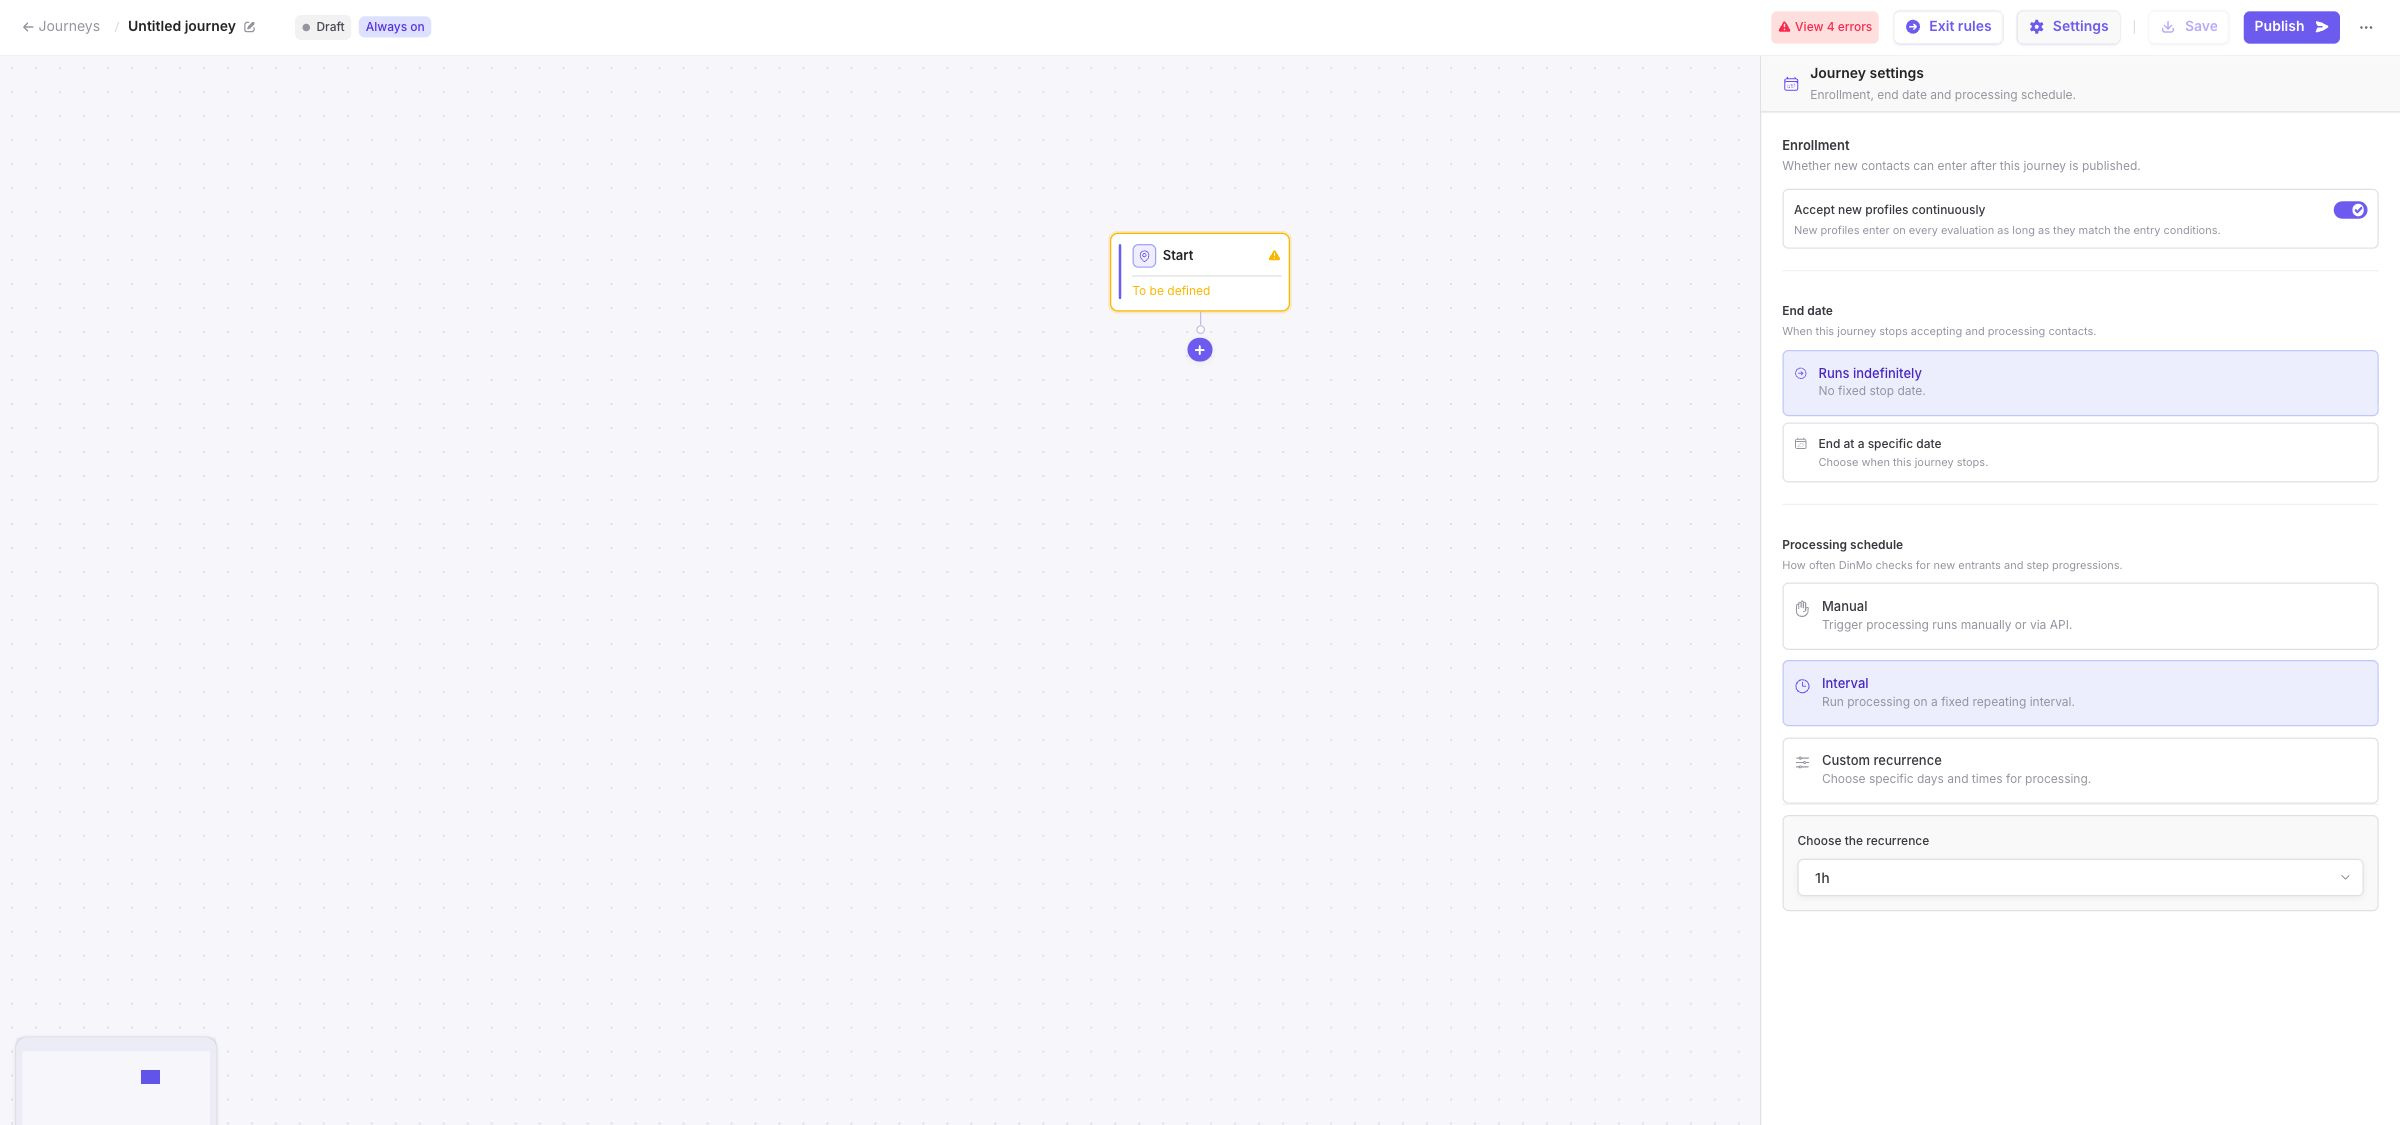
Open **Settings** to define how profiles enter the Journey and when the Journey runs.

### Choose an enrollment mode

| Mode           | Use it when                                                            |
| -------------- | ---------------------------------------------------------------------- |
| **One-time**   | Profiles should be enrolled once when the Journey is launched.         |
| **Continuous** | New eligible profiles should continue entering during subsequent runs. |

For continuous enrollment, you can keep enrollment open indefinitely or define an end date.

### Choose when the Journey runs

The processing schedule determines when DinMo evaluates entry rules and moves profiles through the Journey.

You can run the Journey manually, use a fixed interval, or define a custom recurrence.

<figure><img src="https://3204318043-files.gitbook.io/~/files/v0/b/gitbook-x-prod.appspot.com/o/spaces%2FxzBTp1t4OfqV67nXkVse%2Fuploads%2Fgit-blob-afb38f0981f1ad9057fc171da4ee146f73d0e5f7%2Fjourney-create-settings.jpg?alt=media" alt="Journey settings panel showing continuous enrollment, end date, and processing schedule options"><figcaption><p>Use Journey settings to configure enrollment, an optional end date, and the processing schedule.</p></figcaption></figure>

## 3. Configure the Start step

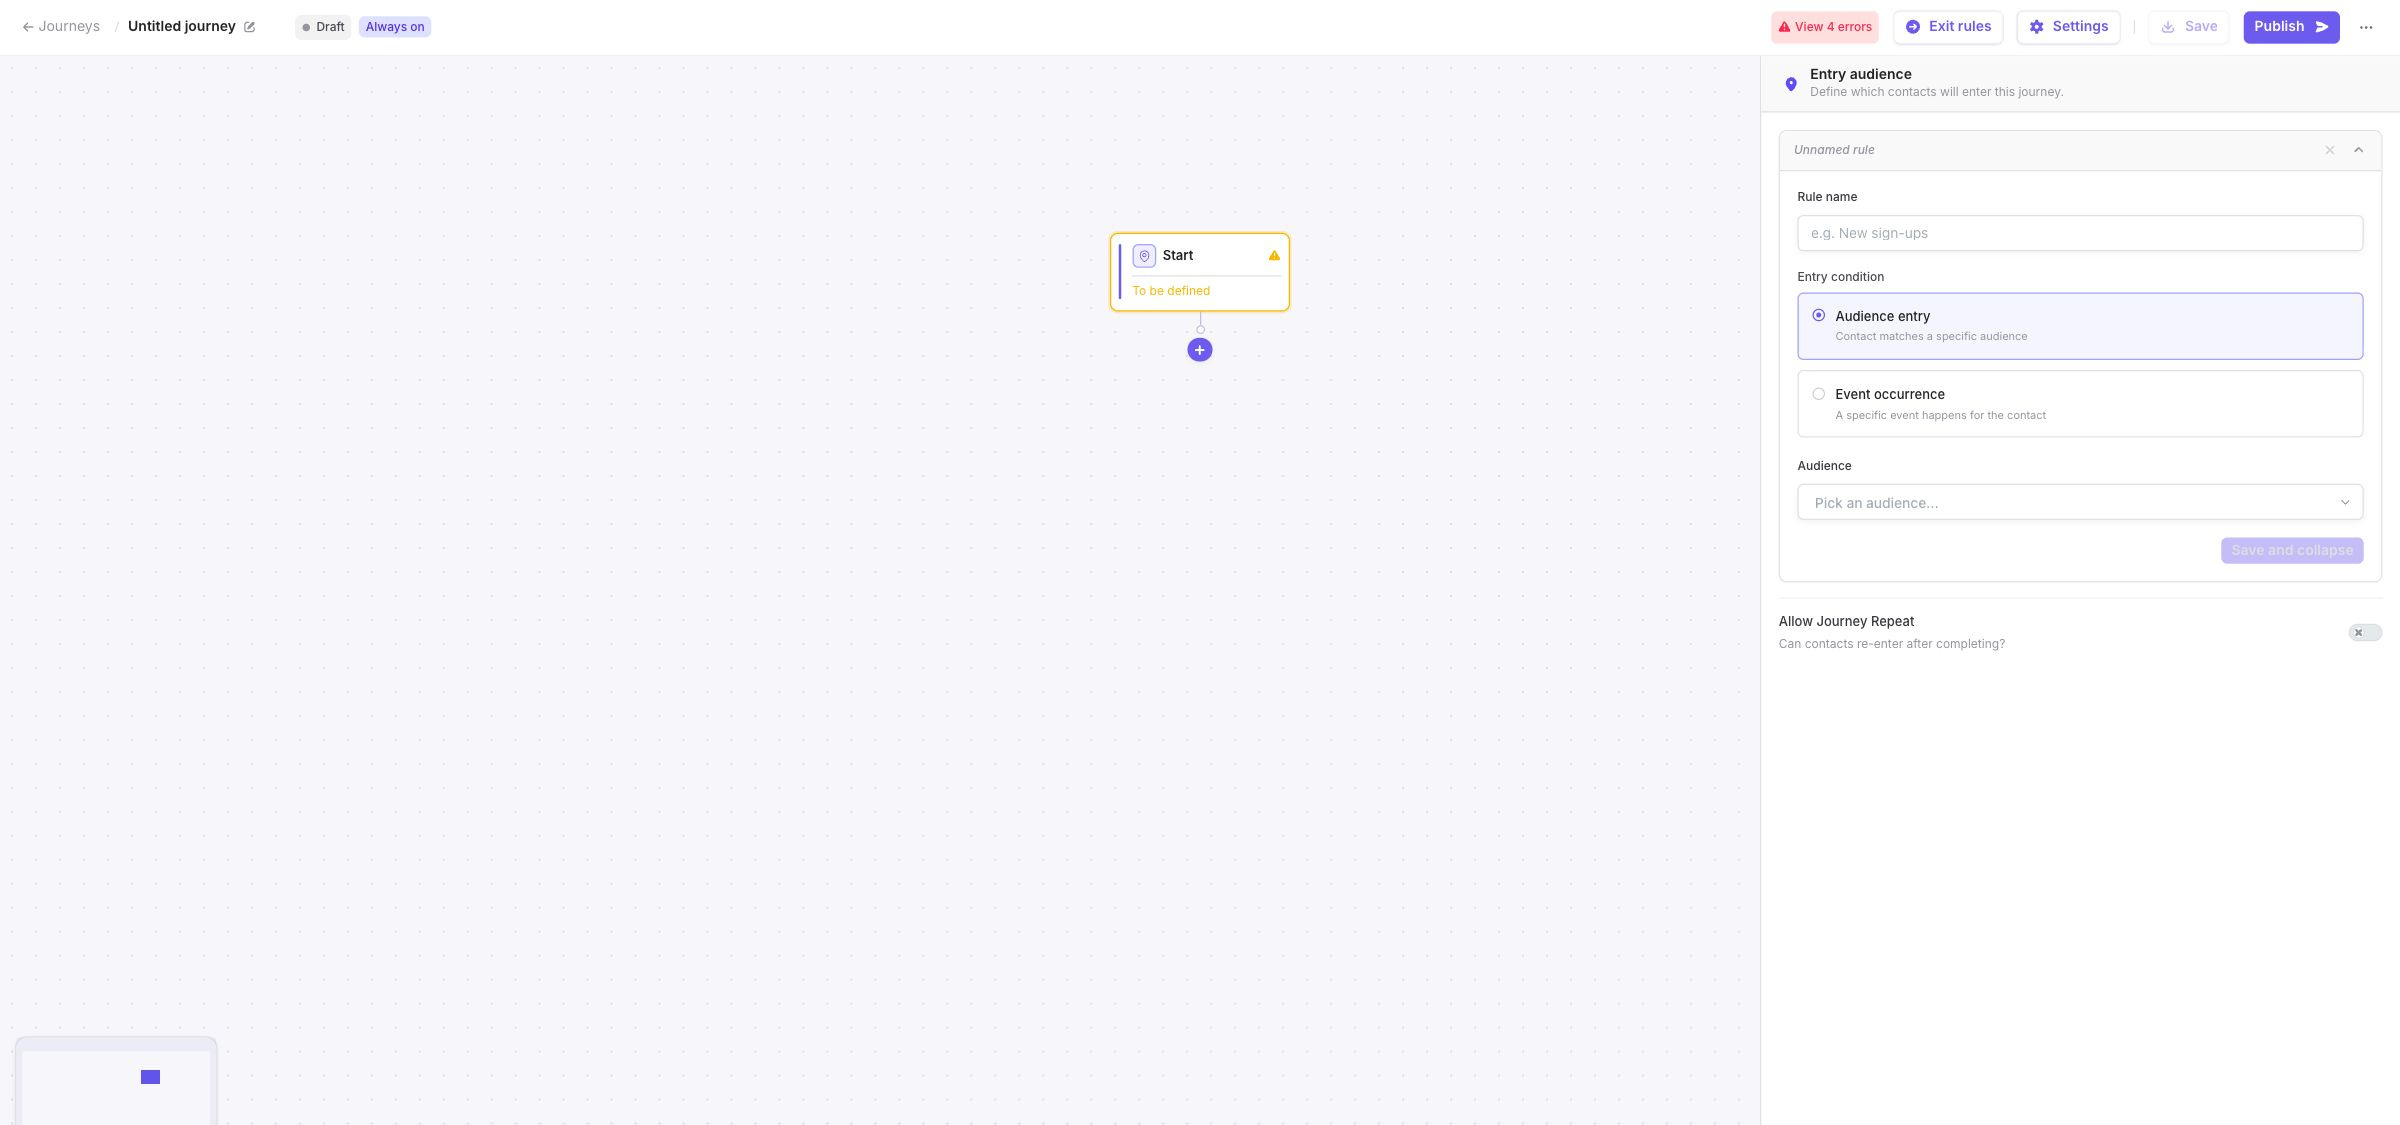
Select the **Start** step and add at least one entry rule.

An entry rule can be based on:

* membership in a DinMo audience;
* the occurrence of a tracked event.

When using an event, you can select the event model, define a minimum number of occurrences, and add conditions when needed.

If you add several entry rules, choose whether profiles must match **any rule** or **all rules**.

For example, you can use one audience to enroll profiles that currently belong to a target group, or an event rule to enroll profiles after a specific action.

<figure><img src="https://3204318043-files.gitbook.io/~/files/v0/b/gitbook-x-prod.appspot.com/o/spaces%2FxzBTp1t4OfqV67nXkVse%2Fuploads%2Fgit-blob-449cc2743eb4dfc61910da18198751e722906bec%2Fjourney-create-entry-rule.jpg?alt=media" alt="Start configuration panel showing Audience entry and Event occurrence options"><figcaption><p>An entry rule can enroll profiles from an audience or when a tracked event occurs.</p></figcaption></figure>

### Configure re-entry if needed

Enable **Allow Journey Repeat** only when the same profile should be allowed to complete the Journey more than once.

When re-entry is enabled, you can define:

* a minimum delay after the profile completes or exits the Journey;
* a maximum number of entries, including the initial entry.

## 4. Add Journey steps

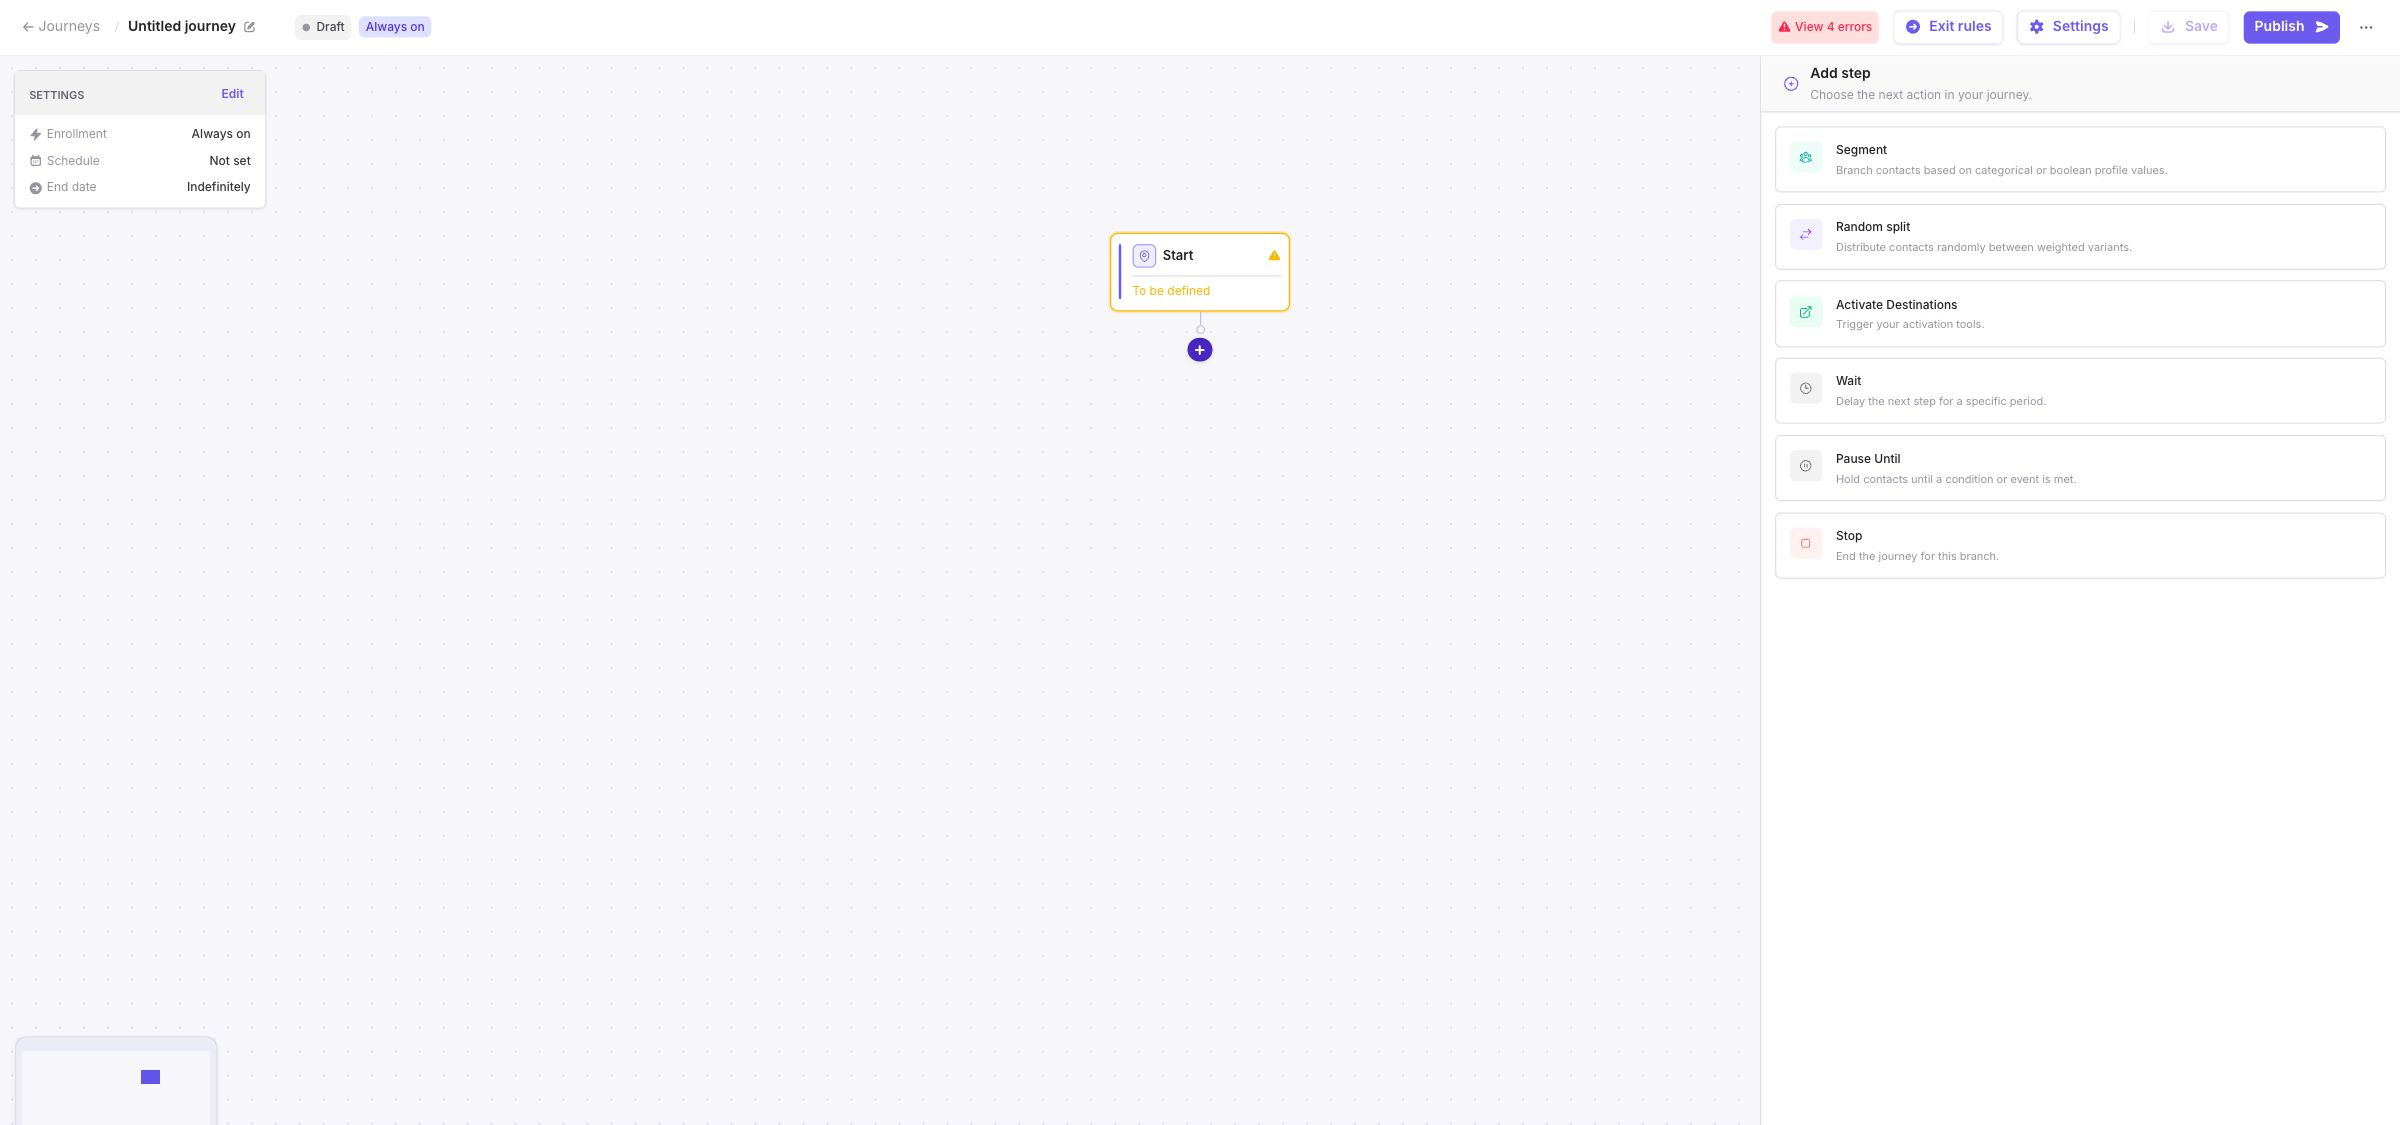
Use the **+** button below a step to choose what should happen next.

For example, you can:

* add a **Wait** step when the next action should happen after a fixed duration;
* add an **Activate** step when profiles should be sent to one or more destinations;
* add a **Segment** step when profiles should follow different paths according to a profile field;
* add a **Pause Until** step when profiles should wait for a condition or event;
* add a **Stop** step when a branch should end.

Add only the steps required by the experience you want to orchestrate. For example, a Wait can be placed before Activate when a destination should be triggered after a delay.

Every branch must eventually end with a Stop step.

<figure><img src="https://3204318043-files.gitbook.io/~/files/v0/b/gitbook-x-prod.appspot.com/o/spaces%2FxzBTp1t4OfqV67nXkVse%2Fuploads%2Fgit-blob-5fc2760bbdedbda8009e8442e2b93f95331a1042%2Fjourney-create-add-step.jpg?alt=media" alt="Add step panel showing the step types available in the Journey builder"><figcaption><p>Select the next step from the builder. The steps you add depend on the timing, actions, and conditions required by your use case.</p></figcaption></figure>

## 5. Add exit rules if needed

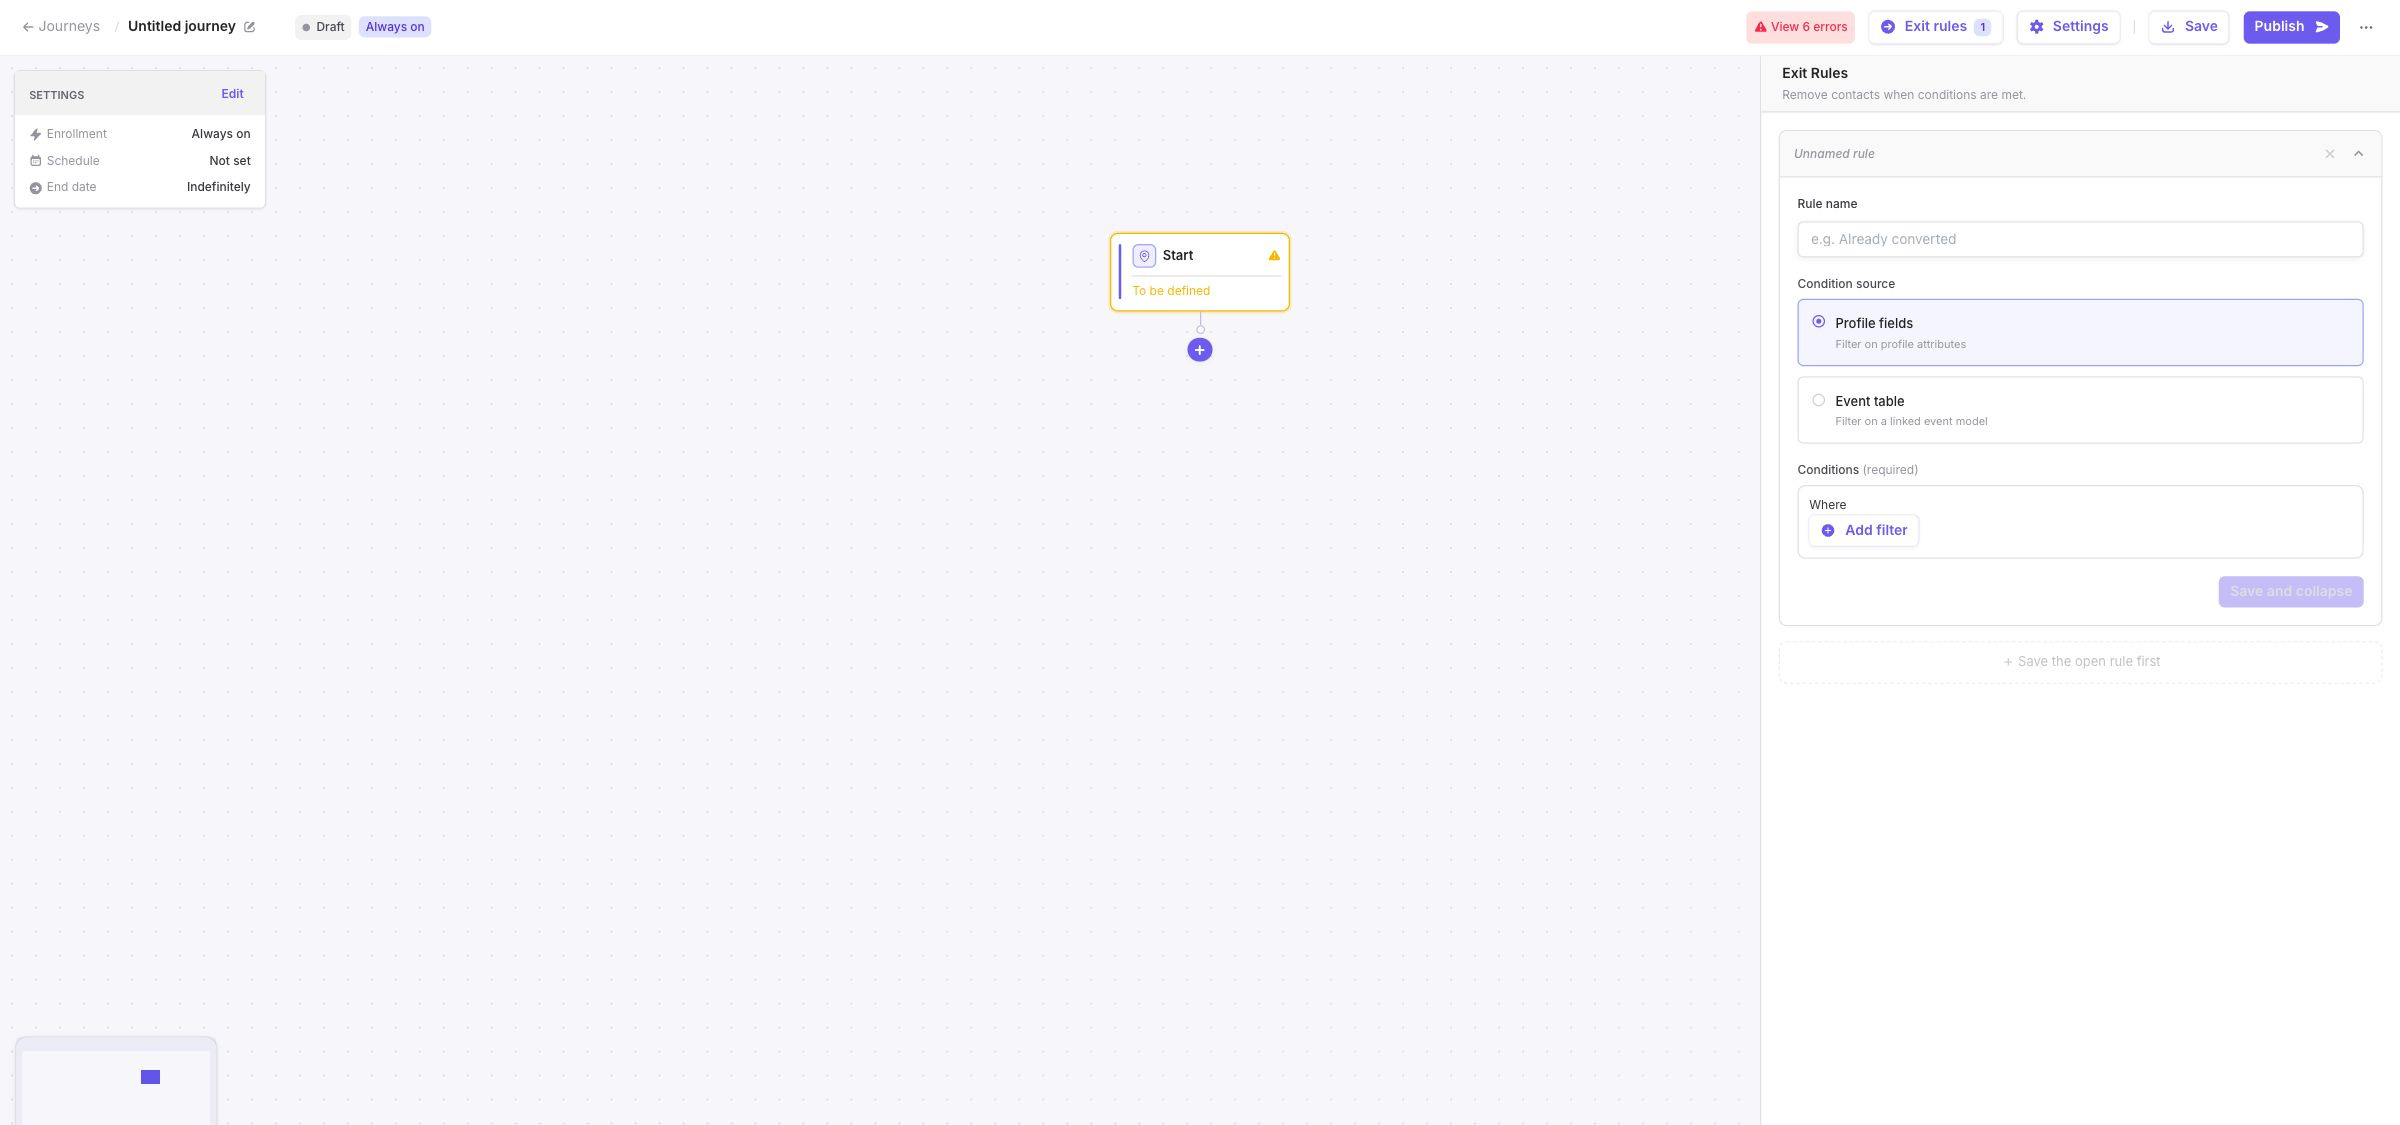
Exit rules remove profiles that should no longer continue through the Journey.

For example, you can remove a profile when:

* its status becomes `converted`;
* a purchase occurs;
* a cancellation event is detected.

An exit rule can use profile fields or an event table. It applies to the entire Journey, regardless of the profile's current step.

You can leave exit rules empty when no early-exit condition is required.

<figure><img src="https://3204318043-files.gitbook.io/~/files/v0/b/gitbook-x-prod.appspot.com/o/spaces%2FxzBTp1t4OfqV67nXkVse%2Fuploads%2Fgit-blob-ccd27d5b86196dd304e8132364b115291a93ce80%2Fjourney-create-exit-rule.jpg?alt=media" alt="Exit Rules panel showing Profile fields and Event table condition sources"><figcaption><p>Exit rules can remove profiles according to profile attributes or tracked events.</p></figcaption></figure>

## 6. Review errors and warnings

DinMo validates the Journey before publication.

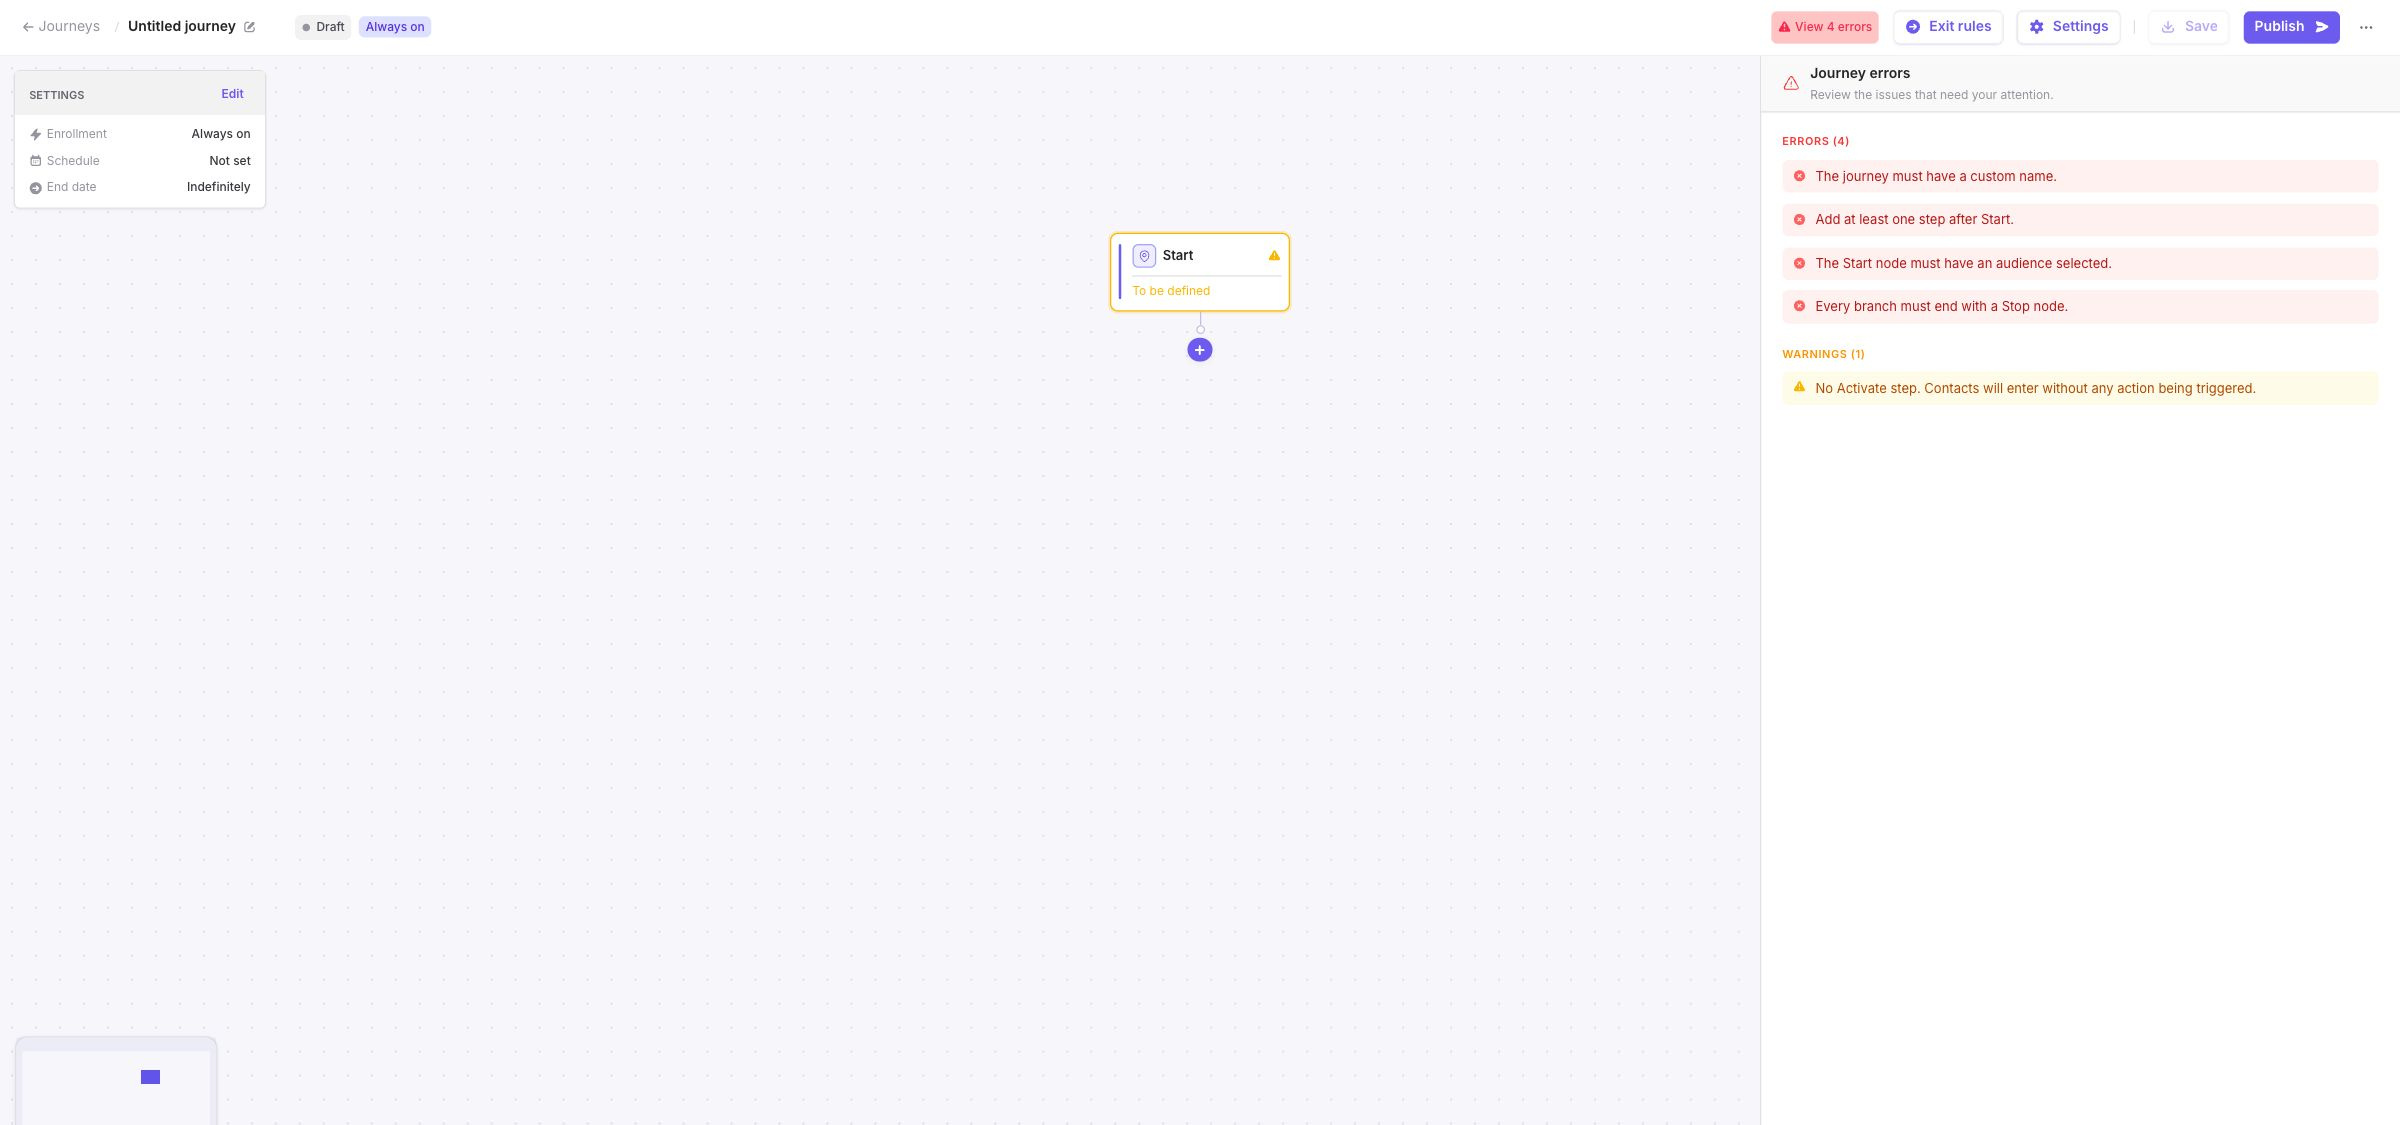
Errors must be resolved before the Journey can be published. For example, DinMo checks that:

* the Journey has a custom name;
* the Start step contains a valid entry rule;
* the Journey contains at least one step after Start;
* required step settings are complete;
* every path ends with a Stop step;
* every step is connected to the Journey.

Warnings do not block publication, but they highlight configurations that should be reviewed. For example, DinMo can warn you when the Journey does not contain an Activate step.

<figure><img src="https://3204318043-files.gitbook.io/~/files/v0/b/gitbook-x-prod.appspot.com/o/spaces%2FxzBTp1t4OfqV67nXkVse%2Fuploads%2Fgit-blob-c9d56a6a2a707b613a3e26aa10de72a3202dfbae%2Fjourney-create-validation.jpg?alt=media" alt="Journey errors panel listing blocking errors and a non-blocking warning"><figcaption><p>Resolve every error and review any warning before publishing the Journey.</p></figcaption></figure>

## 7. Publish the Journey

Before publishing, review:

* who can enter;
* whether profiles can enter more than once;
* the enrollment mode and optional end date;
* the processing schedule;
* the action performed by each path;
* the conditions that may remove profiles early.

Publish the Journey when the configuration matches the expected customer experience.

Its status changes from **Draft** to **Active**.

## 8. Check the first run

After the first execution, open **Run history** and confirm that:

* the run completed successfully;
* the expected profiles entered;
* profiles moved to the expected steps;
* activation volumes are consistent with your entry rules.

You can then return to the draft configuration if the Journey needs additional steps or conditions.

## Related pages

* [Publish and manage a Journey](/journeys/publish-pause-and-resume-a-journey.md)
* [Configure entry, re-entry, and exit rules](/journeys/entry-rules.md)
* [Configure Journey steps and branches](/journeys/steps-and-branches.md)
* [Monitor and troubleshoot a Journey](/journeys/monitoring-and-troubleshooting.md)


---

# Agent Instructions
This documentation is published with GitBook. GitBook is the documentation platform designed so that both humans and AI agents can read, navigate, and reason over technical content effectively. Learn more at gitbook.com.

## Querying This Documentation
If you need additional information that is not directly available in this page, you can query the documentation dynamically by asking a question.

Perform an HTTP GET request on the current page URL with the `ask` query parameter, and the optional `goal` query parameter:

```
GET https://docs.dinmo.io/journeys/create-your-first-journey.md?ask=<question>&goal=<endgoal>
```

`ask` is the immediate question: it should be specific, self-contained, and written in natural language.
`goal` is optional and describes the broader end goal you are ultimately trying to accomplish on behalf of the user. GitBook uses it to tailor the answer towards what is most useful for that goal.

The response will contain a direct answer to the question and relevant excerpts and sources from the documentation.

Use this mechanism when the answer is not explicitly present in the current page, you need clarification or additional context, or you want to retrieve related documentation sections.