> For the complete documentation index, see [llms.txt](https://docs.dinmo.io/llms.txt). Markdown versions of documentation pages are available by appending `.md` to page URLs; this page is available as [Markdown](https://docs.dinmo.io/integrations/dinmo-ingest/zendesk-support/setup-guide.md).
# Setup Guide
## Prerequisites
To connect Zendesk Support, you need:
* Your Zendesk Support domain name. Your Zendesk Support domain is the beginning of your help desk URL. It's usually your company name, for example `dinmo` in `dinmo.zendesk.com`.
* A Zendesk account with an Administrator role. If you don't know if your account is an Administrator, proceed to the In Zendesk section.
## In Zendesk
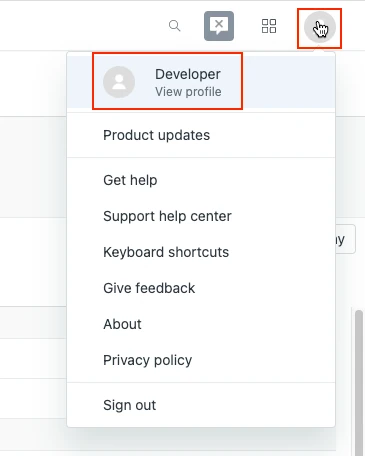
1. To check if your account is an Administrator, log in to Zendesk and go to your profile.
2. Verify that your user type is **Administrator**.
If you don't have an administrator login for Zendesk, you will need to ask someone else in your company who does.
## Setup instructions
1. In the connection setup form, enter the **Destination schema** name of your choice.
2. Enter your Zendesk Support **Domain** name.
3. In the **Historical sync time frame** drop-down menu, select the option on how you'd like the data to be synced.
* If you choose **Sync all historical data** option, DinMo will sync all the historical data.
* If you choose **Sync data from selected date** option, enter a date in the **Historical Sync Start Date** field. DinMo will sync the data from the specified date.
The **Historical sync time frame** field is visible only if you have entered the **Domain** in the setup form.
4. In the **Max Zendesk API usage (%)** field, enter the maximum percentage of Zendesk API usage you want to allow for this connection. The default value is 90%.
5. Click **Authorize**. You will redirected to Zendesk's login page.
6. Log in to your Zendesk account and follow the instructions to authorize DinMo's access.
We recommend logging in while in Incognito mode to ensure authorization of the correct account.
7. You will be redirected back to DinMo. Click **Save & Test**. DinMo will take it from here and sync your data from your Zendesk account.
---
# Agent Instructions
This documentation is published with GitBook. GitBook is the documentation platform designed so that both humans and AI agents can read, navigate, and reason over technical content effectively. Learn more at gitbook.com.
## Querying This Documentation
If you need additional information that is not directly available in this page, you can query the documentation dynamically by asking a question.
Perform an HTTP GET request on the current page URL with the `ask` query parameter, and the optional `goal` query parameter:
```
GET https://docs.dinmo.io/integrations/dinmo-ingest/zendesk-support/setup-guide.md?ask=&goal=
```
`ask` is the immediate question: it should be specific, self-contained, and written in natural language.
`goal` is optional and describes the broader end goal you are ultimately trying to accomplish on behalf of the user. GitBook uses it to tailor the answer towards what is most useful for that goal.
The response will contain a direct answer to the question and relevant excerpts and sources from the documentation.
Use this mechanism when the answer is not explicitly present in the current page, you need clarification or additional context, or you want to retrieve related documentation sections.