Google BigQuery
Connecting DinMo to Google BigQuery: Step-by-Step Guide
Overview
The connection process involves generating a Google Cloud service account, and granting it with the following roles:
BigQuery UserData Viewer
DinMo will automatically create the following datasets to store its technical data:
dinmo_segments: storing views of the query of the segments and entities created within DinModinmo_stats: storing tables that contain statistics about your segmentsdinmo_delta_storage: storing snapshots of a historical run of segments queries that enable DinMo to calculate the changes that occur on a segment and update, therefore, the destinationdinmo_predictions: storing AI attributes such as churn likelihood and expected lifetime value.
These datasets should not be altered in your BigQuery project.
Source setup details
Learn how to create a source in our step-by-step tutorial
In the connection process:
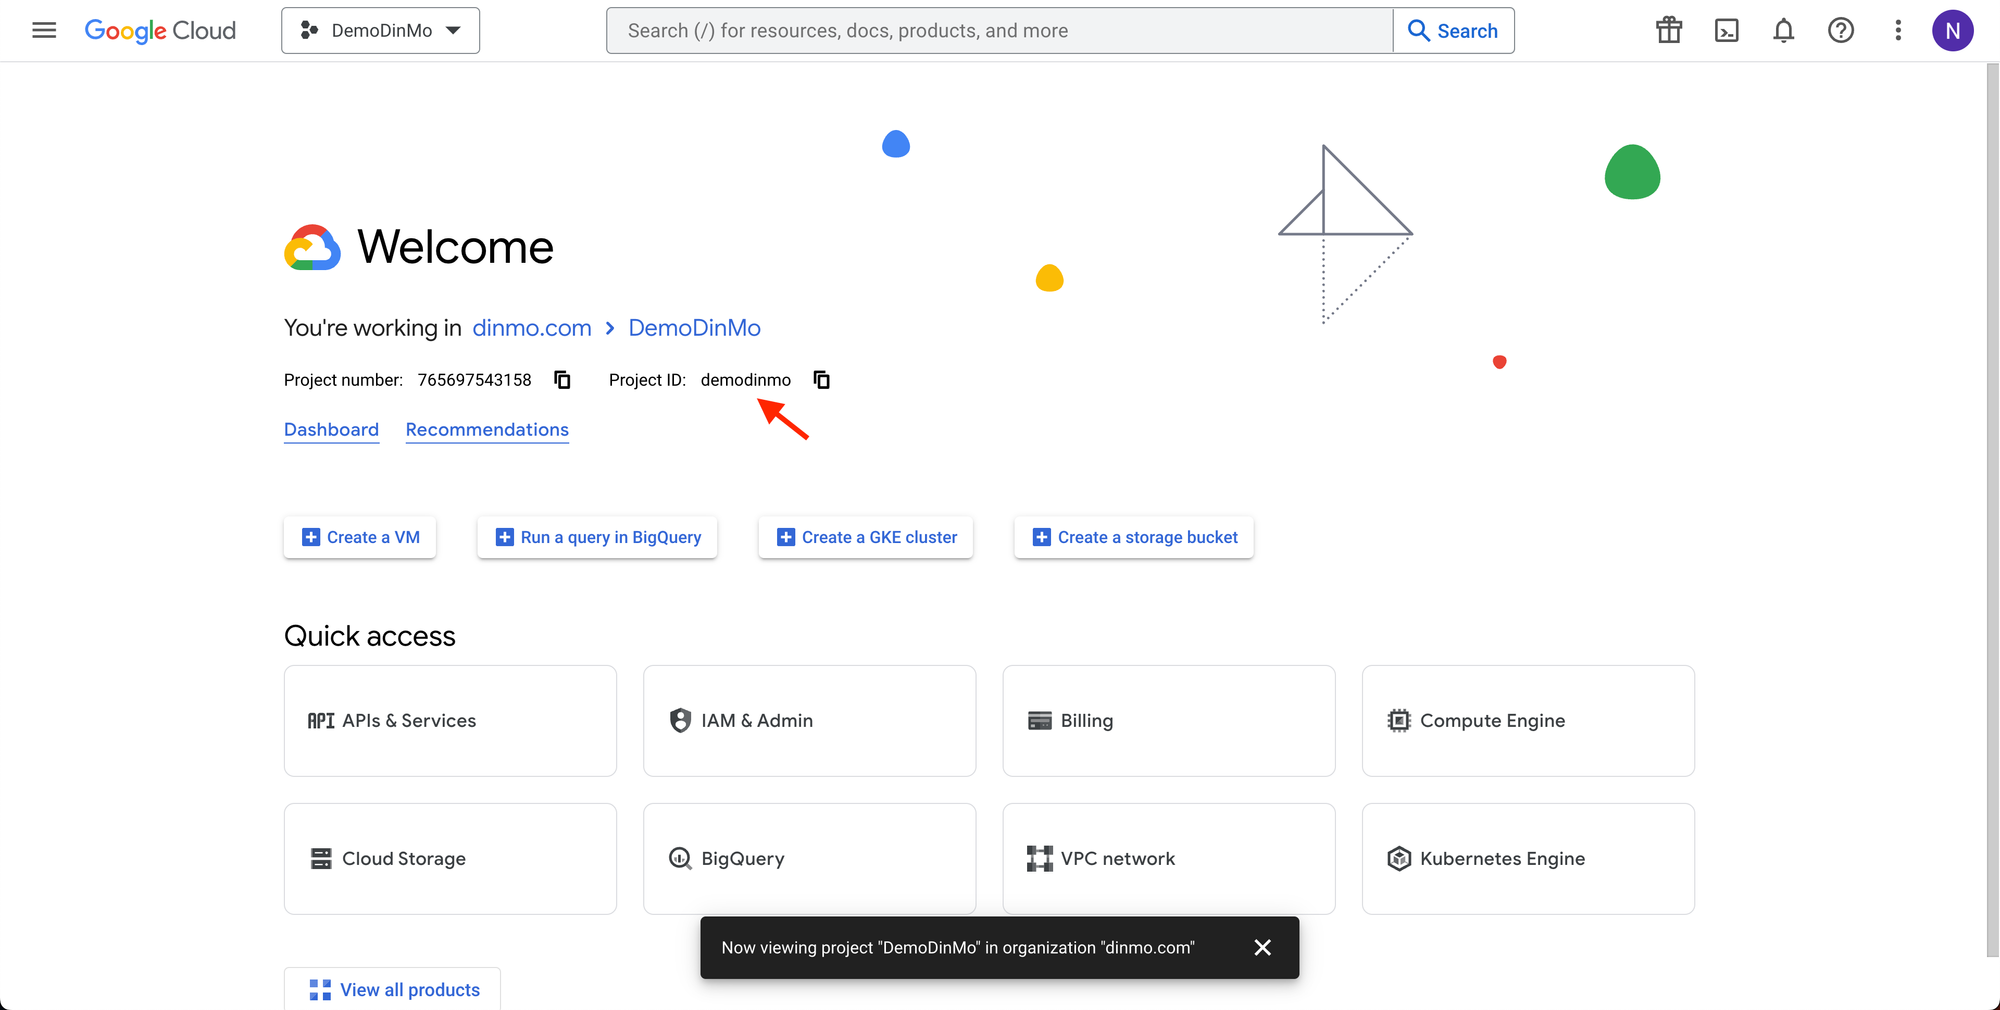
You will need to fill in the Google Cloud Project id.
This information is displayed in the Google Cloud interface:

Note that the Google Cloud project id might sometimes differ from the Google Cloud project name.
You should fill in the internal project id field only if you want DinMo to store its technical data in a separate project. If left blank, DinMo will be storing these data in the project mentioned above.
The project region refers to where the tables are stored. DinMo only supports one region per BigQuery source, so please ensure you store your data in the same region. In case you decided to use two separate projects, please ensure that the location region remains the same for both projects.
The source name is only used as a display name in DinMo.
To generate a DinMo service account, simply click the corresponding button.
Depending if you chose to store data in a separate project or not, it will generate two or four blocks of codes.
Simply copy these blocks of code and run them in your BigQuery console, without changing their values.


Step 4: Hit Save & Test in the bottom right of the page. If the tests do not encounter any issue, your source will be connected!
Note: when testing the connection, the Google BigQuery project must contain a table, otherwise, an empty project will cause an error in the test.
Here is the revised troubleshooting guide for BigQuery.
It follows the exact structure of your Redshift documentation but is technically adapted for Google Cloud. It focuses on the core issue: Table recreation by dbt wipes out table-level permissions.
Handling Privilege Issues when using dbt (BigQuery)
Understanding the Issue
When using dbt to transform data in BigQuery, models (tables and views) are frequently dropped and recreated as part of the transformation process. This results in a loss of privileges for the DinMo Service Account because:
Table Permissions are volatile: In BigQuery, if you grant access specifically on a table, that permission is attached to that specific object.
Recreation breaks the link: When dbt runs, it deletes the old table and creates a fresh one. The new table does not inherit the manual permissions granted on the previous version.
Consequently, if the DinMo Service Account does not have permissions at the Dataset level, it loses access immediately after a dbt run.
Solution Overview
To ensure the DinMo Service Account retains access to newly created tables, you can:
Grant roles at the Dataset level (Recommended). This creates a "default privilege" where all current and future tables inherit access.
Use dbt’s built-in grants configuration to automatically re-grant the privilege every time the table is recreated.
Solution 1. Granting Dataset-Level Privileges (Recommended)
The most robust solution is to grant the BigQuery Data Viewer role to the DinMo Service Account on the entire Dataset. This ensures that even if dbt drops and recreates tables, the Service Account retains access via the parent Dataset.
Detailed Steps
1. Identify the Service Account and Target Dataset
Service Account: The email address of the DinMo Service Account (e.g.,
[email protected]).Dataset: The dataset where dbt creates your tables (e.g.,
analytics_prod).
2. Grant the Role Run the following SQL command in the BigQuery console. This ensures all tables inside the dataset are accessible.
Important Notes:
The
serviceAccount:prefix is mandatory in BigQuery SQL when granting to a Service Account.This method eliminates the need to configure permissions inside dbt.
Solution 2. Using dbt's Built-in Grants Configuration
If your security policies prevent you from granting Dataset-level access (forcing you to grant access table-by-table), you must configure dbt to automatically re-grant the role after every run.
Steps to Implement
Configure Grants in dbt In your dbt_project.yml file, add the following configuration. This tells dbt to issue a GRANT command immediately after creating the table.
Role: You must use the full IAM role string:
roles/bigquery.dataViewer.Principal: You must use the
serviceAccount:prefix before the email address.
Configure Grants for Specific Folders (Optional) If DinMo only needs access to a specific subset of data, you can apply the grant to a specific folder:
How It Works
dbt's
grantsFeature: dbt creates the table, then immediately runs a separate DCL statement to grant access to the Service Account.Consistency: Because the grant is part of the dbt code, the permission is restored every time the table is recreated, preventing the "lost access" error.
Important Notes
dbt Version: Ensure you are using dbt v1.0 or later.
Prefixes: Unlike Redshift, BigQuery requires the
serviceAccount:prefix. If this is omitted in the dbt config, the grant will fail or be ignored.
Last updated